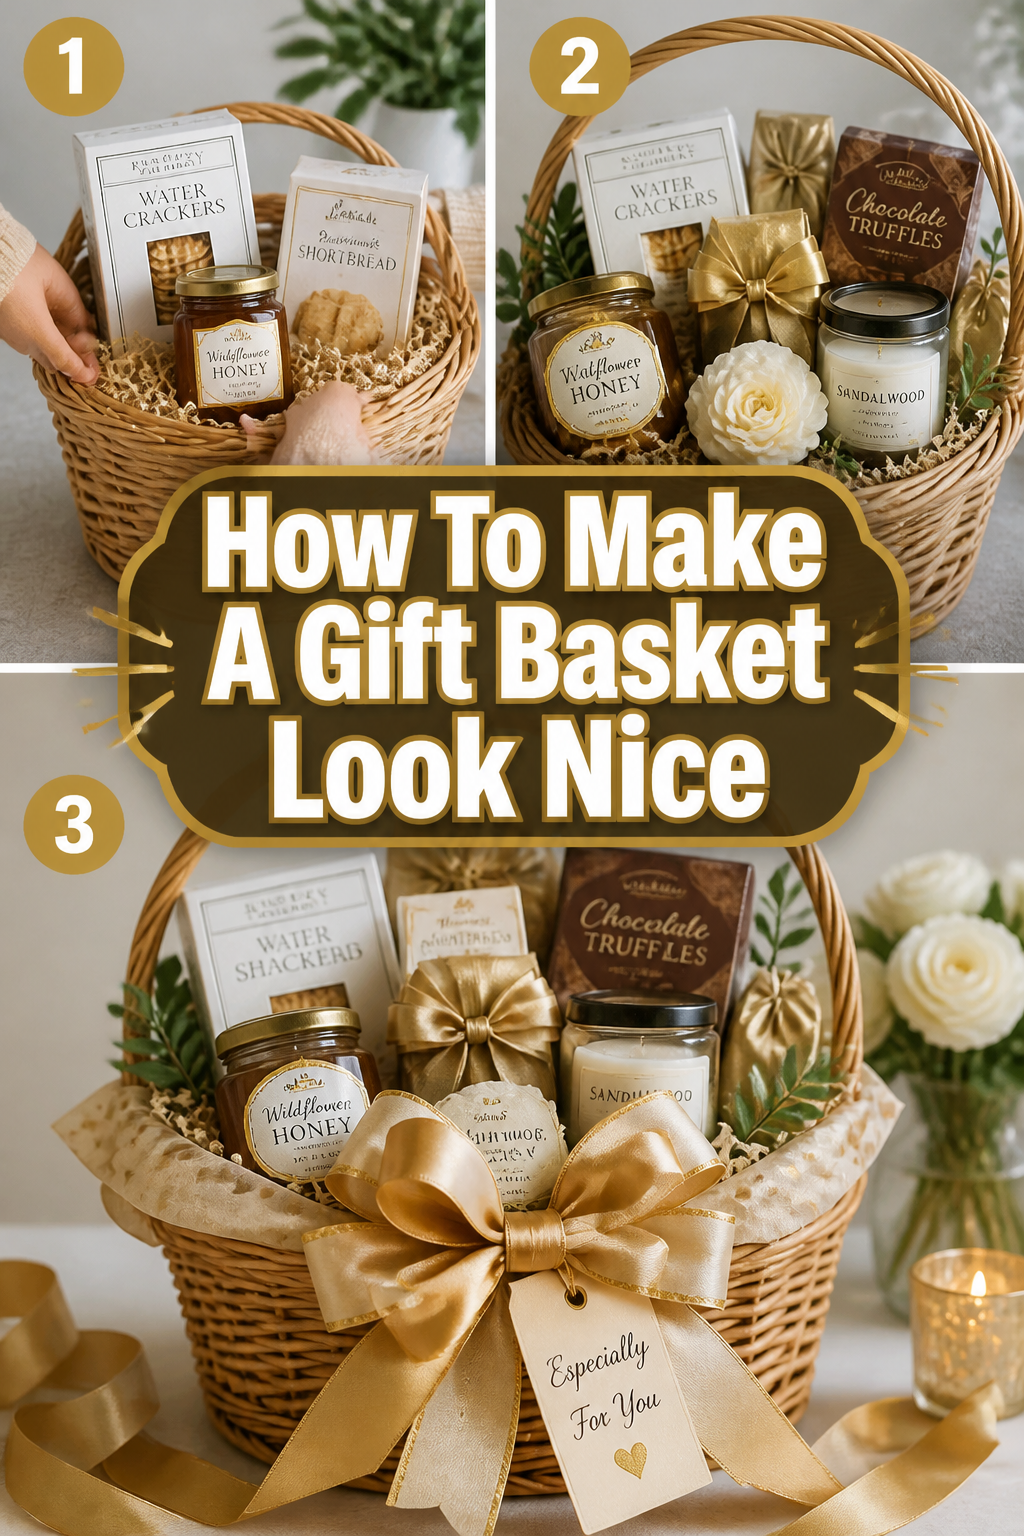
🎁 How To Make A Gift Basket Look Nice
📋 The Event Planner's Essential Toolkit
Whether you're throwing a massive birthday bash or an intimate baby shower, the right tools make execution effortless. These are the 5 essential items that professional event coordinators and DIY party hosts consistently rely on to pull off flawless celebrations without the stress.
🎈 Electric Dual-Nozzle Balloon Pump
The absolute lifeline for creating those trending balloon arches and garlands that everyone loves. This dual-nozzle pump lets you inflate hundreds of balloons in a fraction of the time, saving your lungs and transforming hours of prep work into minutes.
🛡️ Command Clear Party Hooks & Strips
The secret to magazine-worthy venue decorations without losing your security deposit. Professional planners stock up on these clear, damage-free hooks to hang banners, string lights, and paper lanterns securely on walls and ceilings, removing cleanly when the party is over.
🧁 Wilton Tiered Cupcake & Dessert Stand
The easiest way to make a simple dessert table look professionally catered. This customizable, multi-tier display stand gives crucial height and dimension to your treats, effortlessly elevating the presentation of cupcakes, cookies, or appetizers at any gathering.
🚂 Heavy-Duty Collapsible Utility Wagon
The unsung hero of off-site parties, park birthdays, and trunk-or-treats. This rugged folding wagon hauls folding chairs, coolers, and mountains of decor from your car to the venue in one trip, completely eliminating the exhausting pre-party back-and-forth hauling.
📓 Clever Fox Event Planner Organizer
The ultimate command center for keeping your sanity intact while hosting. Dedicated sections for guest lists, budget tracking, vendor contacts, and day-of timelines ensure that not a single crucial detail falls through the cracks before the big day.
When I first started creating gift baskets, they often looked a little… haphazard. But through countless birthdays, baby showers, and holiday gatherings, I discovered the magic of thoughtful presentation. This guide is your secret weapon to crafting baskets that aren’t just gifts, but cherished experiences, making every celebration feel extra special.

Quick Overview
Get ready to transform simple items into stunning, Pinterest-worthy gift baskets. You’ll learn the art of selection, arrangement, and embellishment, ensuring your gifts leave a lasting impression.
- Time needed: 1-2 hours (depending on complexity and shopping)
- Difficulty: Beginner
- What you’ll need: A basket or container, filler, gifts, cellophane, ribbon, and creative flair!
Step-by-Step Instructions
Step 1: Choose Your Canvas – The Perfect Container
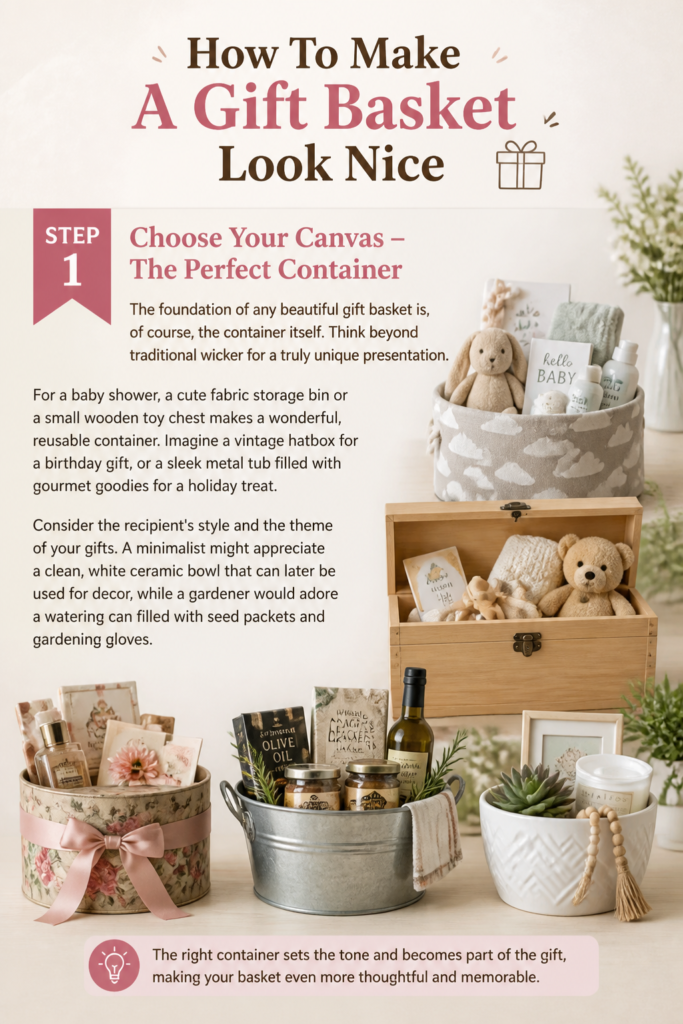
The foundation of any beautiful gift basket is, of course, the container itself. Think beyond traditional wicker for a truly unique presentation.
For a baby shower, a cute fabric storage bin or a small wooden toy chest makes a wonderful, reusable container. Imagine a vintage hatbox for a birthday gift, or a sleek metal tub filled with gourmet goodies for a holiday treat.
Consider the recipient’s style and the theme of your gifts. A minimalist might appreciate a clean, white ceramic bowl that can later be used for decor, while a gardener would adore a watering can filled with seed packets and gardening gloves.
Step 2: Curate Your Treasures – Thoughtful Gift Selection
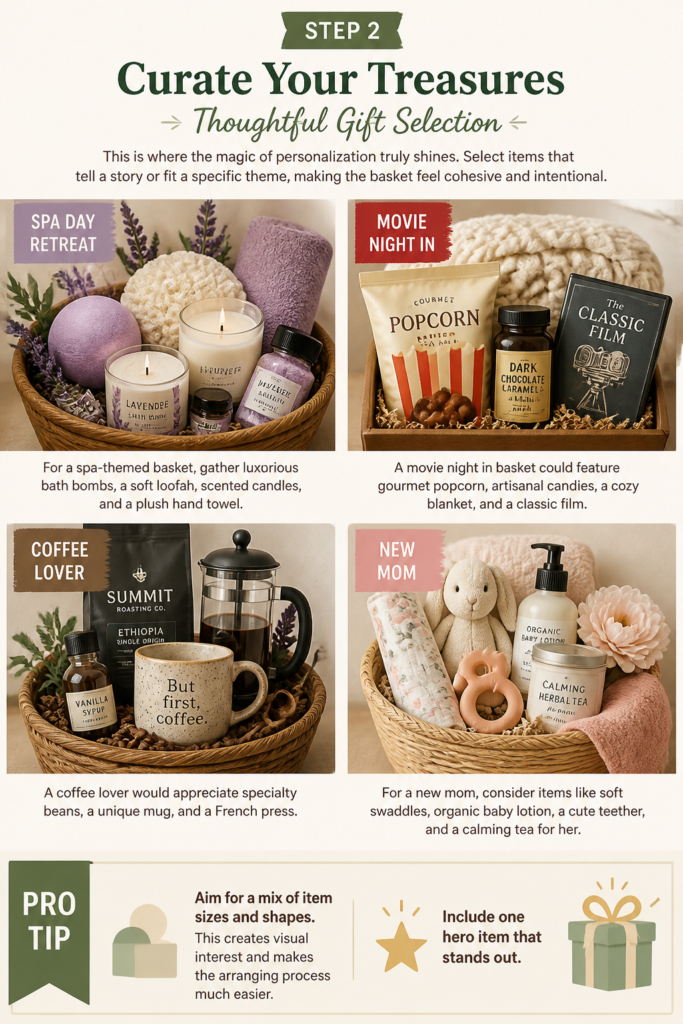
This is where the magic of personalization truly shines. Select items that tell a story or fit a specific theme, making the basket feel cohesive and intentional.
For a spa-themed basket, gather luxurious bath bombs, a soft loofah, scented candles, and a plush hand towel. A “movie night in” basket could feature gourmet popcorn, artisanal candies, a cozy blanket, and a classic film.
Think about the recipient’s hobbies and passions. A coffee lover would appreciate specialty beans, a unique mug, and a French press. For a new mom, consider items like soft swaddles, organic baby lotion, a cute teether, and a calming tea for her.
Pro Tip: Aim for a mix of item sizes and shapes. This creates visual interest and makes the arranging process much easier. Include one “hero” item that stands out.
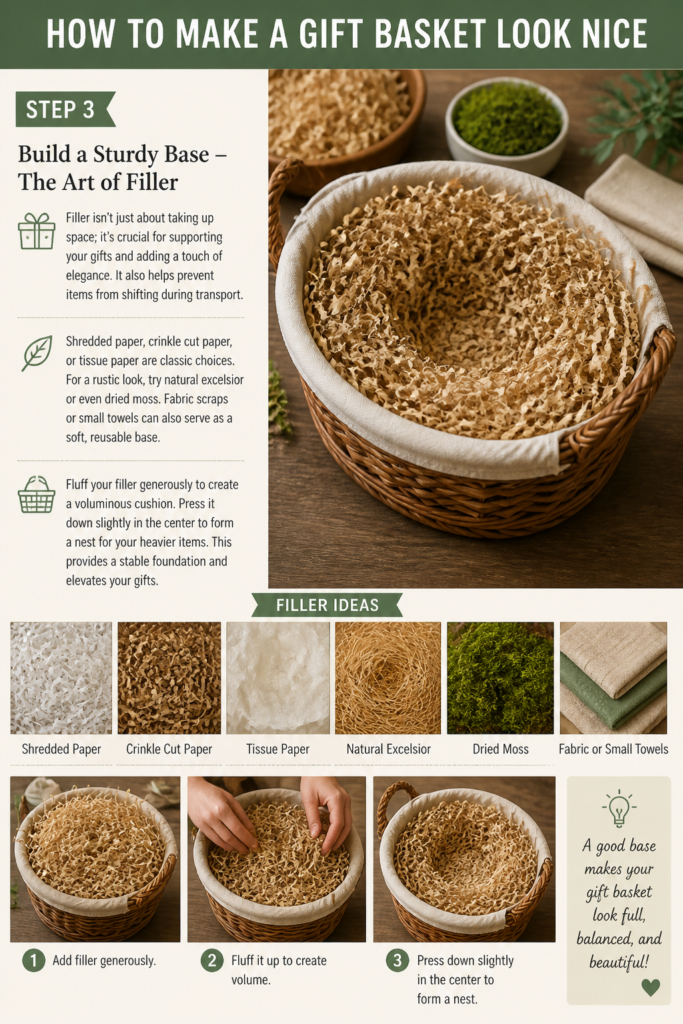
Step 3: Build a Sturdy Base – The Art of Filler
Filler isn’t just about taking up space; it’s crucial for supporting your gifts and adding a touch of elegance. It also helps prevent items from shifting during transport.
Shredded paper, crinkle cut paper, or tissue paper are classic choices. For a rustic look, try natural excelsior or even dried moss. Fabric scraps or small towels can also serve as a soft, reusable base.
Fluff your filler generously to create a voluminous cushion. Press it down slightly in the center to form a nest for your heavier items. This provides a stable foundation and elevates your gifts.
Step 4: Anchor Your Stars – Placing the Tallest and Heaviest Items
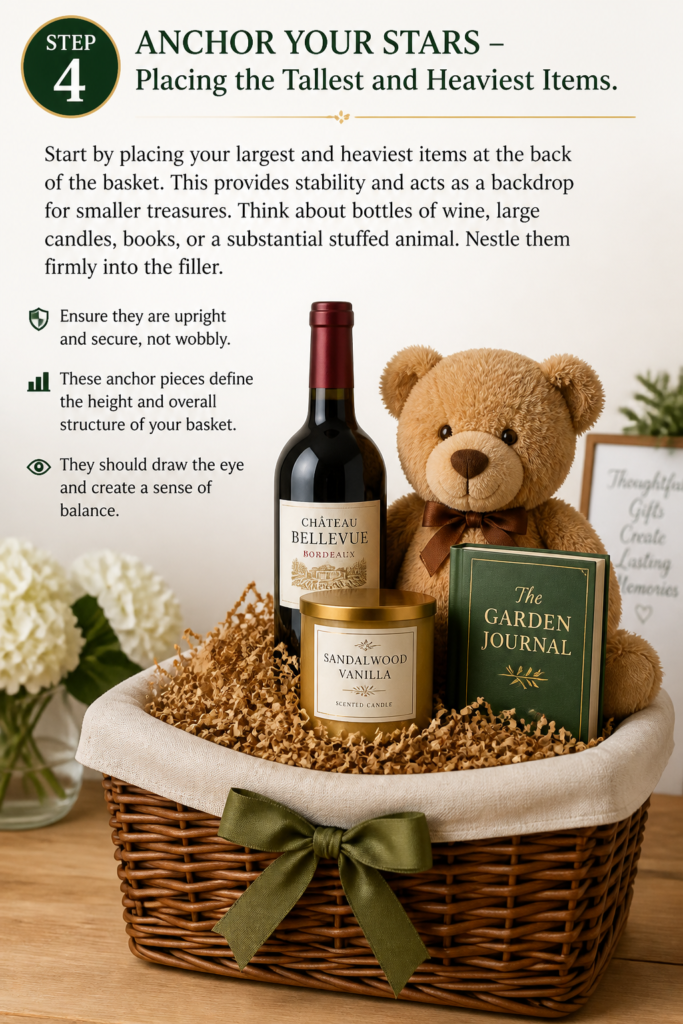
Start by placing your largest and heaviest items at the back of the basket. This provides stability and acts as a backdrop for smaller treasures.
Think about bottles of wine, large candles, books, or a substantial stuffed animal. Nestle them firmly into the filler. Ensure they are upright and secure, not wobbly.
These anchor pieces define the height and overall structure of your basket. They should draw the eye and create a sense of balance.
Step 5: Layer and Balance – Arranging Medium-Sized Gifts
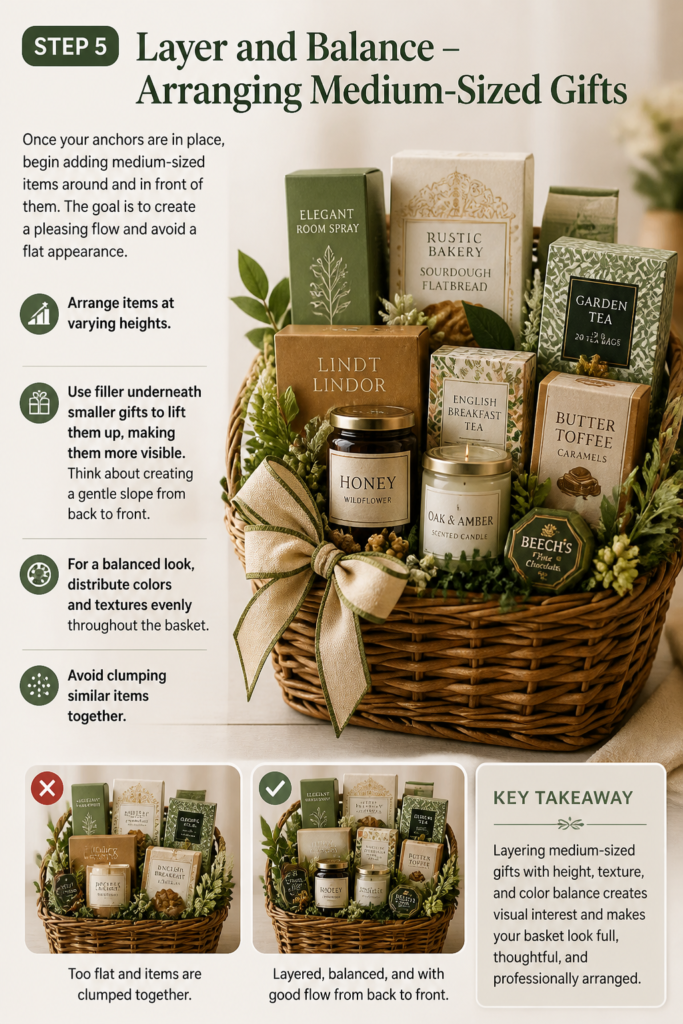
Once your anchors are in place, begin adding medium-sized items around and in front of them. The goal is to create a pleasing flow and avoid a “flat” appearance.
Arrange items at varying heights. Use filler underneath smaller gifts to lift them up, making them more visible. Think about creating a gentle slope from back to front.
For a balanced look, distribute colors and textures evenly throughout the basket. Avoid clumping similar items together.
Step 6: Tuck in the Details – Adding Smaller Delights
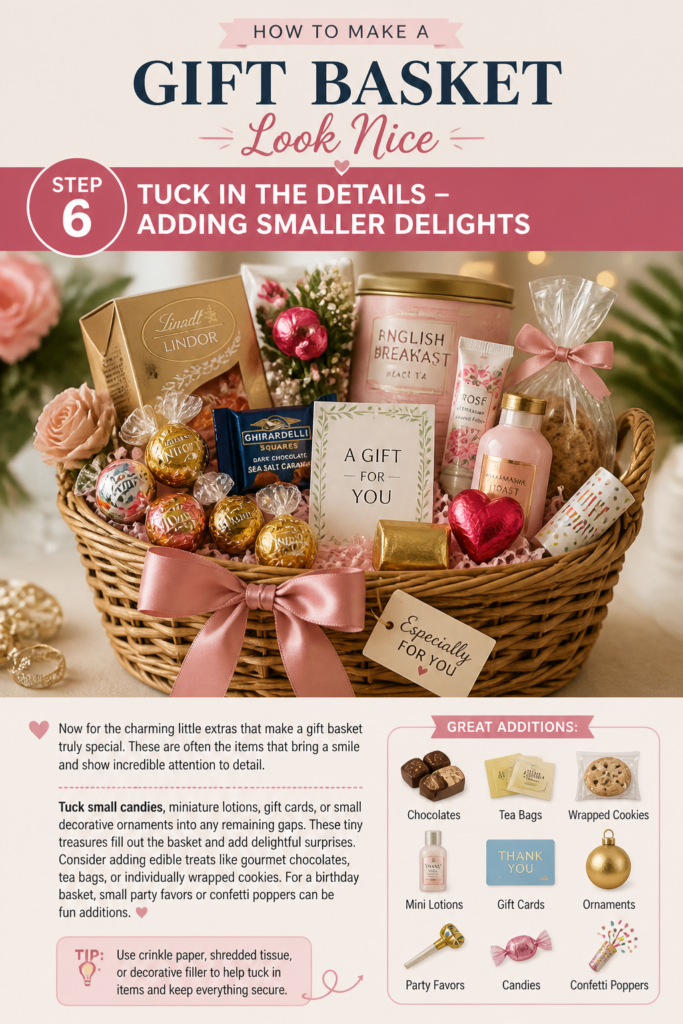
Now for the charming little extras that make a gift basket truly special. These are often the items that bring a smile and show incredible attention to detail.
Tuck small candies, miniature lotions, gift cards, or small decorative ornaments into any remaining gaps. These tiny treasures fill out the basket and add delightful surprises.
Consider adding edible treats like gourmet chocolates, tea bags, or individually wrapped cookies. For a birthday basket, small party favors or confetti poppers can be fun additions.
Step 7: The Grand Reveal – Wrapping with Cellophane
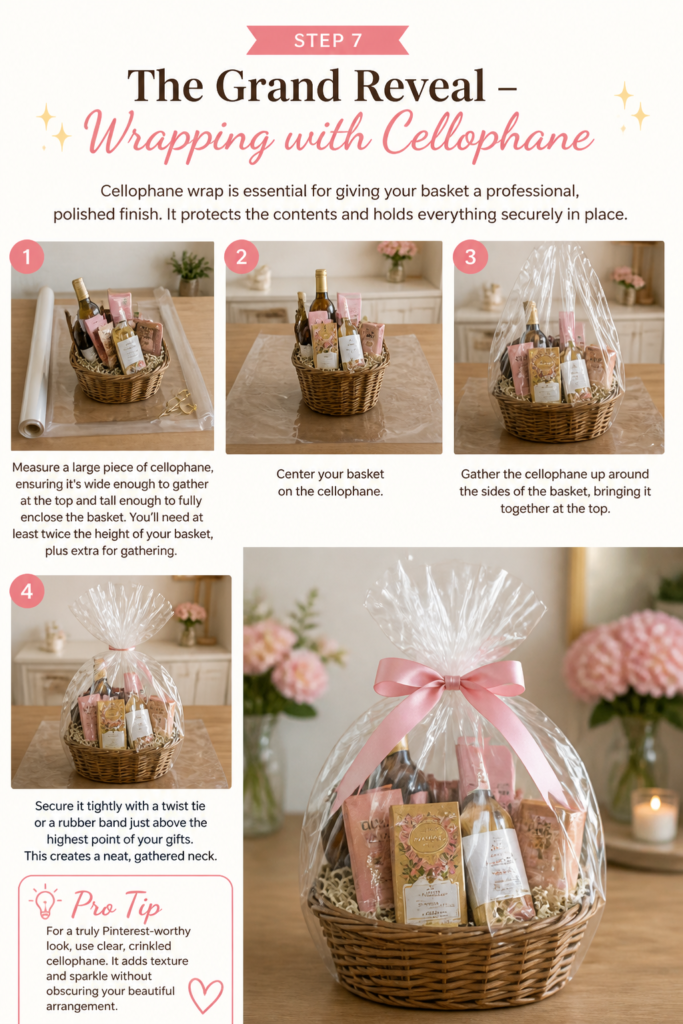
Cellophane wrap is essential for giving your basket a professional, polished finish. It protects the contents and holds everything securely in place.
Measure a large piece of cellophane, ensuring it’s wide enough to gather at the top and tall enough to fully enclose the basket. You’ll need at least twice the height of your basket, plus extra for gathering.
Center your basket on the cellophane. Gather the cellophane up around the sides of the basket, bringing it together at the top.
Secure it tightly with a twist tie or a rubber band just above the highest point of your gifts. This creates a neat, gathered neck.
Pro Tip: For a truly Pinterest-worthy look, use clear, crinkled cellophane. It adds texture and sparkle without obscuring your beautiful arrangement.
Step 8: The Finishing Flourish – Ribbon and Embellishments
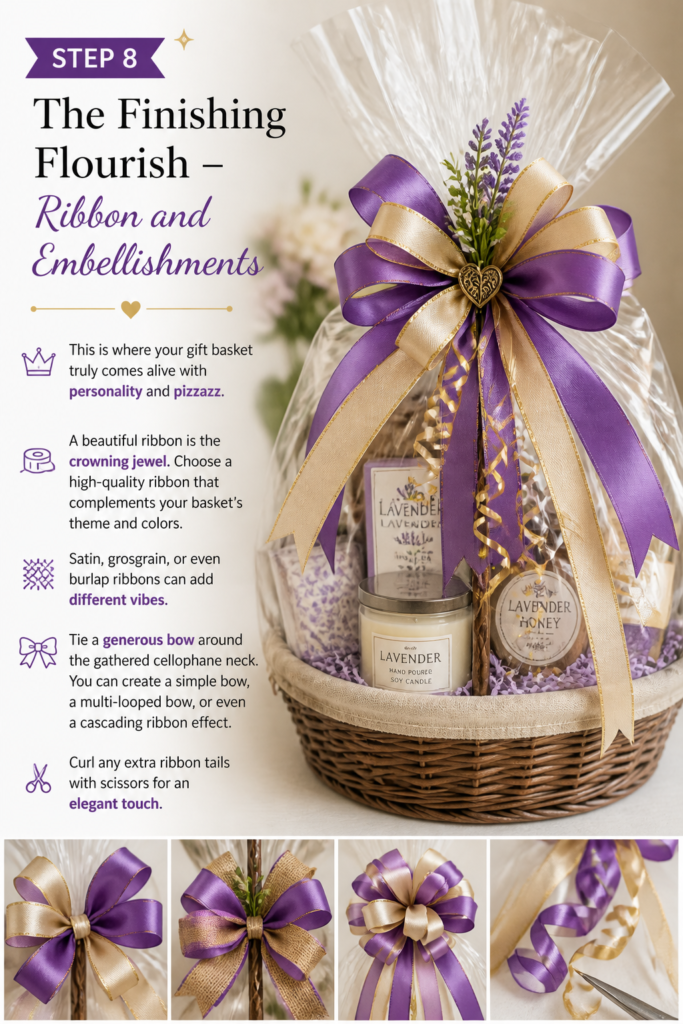
This is where your gift basket truly comes alive with personality and pizzazz. A beautiful ribbon is the crowning jewel.
Choose a high-quality ribbon that complements your basket’s theme and colors. Satin, grosgrain, or even burlap ribbons can add different vibes.
Tie a generous bow around the gathered cellophane neck. You can create a simple bow, a multi-looped bow, or even a cascading ribbon effect.
Curl any extra ribbon tails with scissors for an elegant touch.
Step 9: Personalize and Perfect – Tags and Decorations
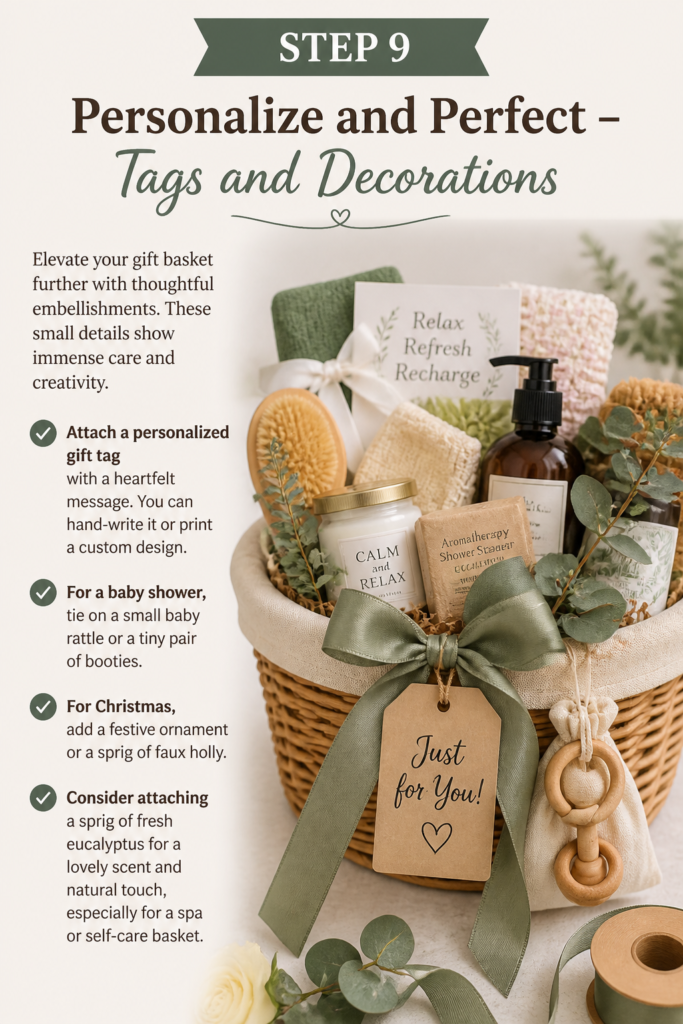
Elevate your gift basket further with thoughtful embellishments. These small details show immense care and creativity.
Attach a personalized gift tag with a heartfelt message. You can hand-write it or print a custom design.
For a baby shower, tie on a small baby rattle or a tiny pair of booties. For Christmas, add a festive ornament or a sprig of faux holly.
Consider attaching a sprig of fresh eucalyptus for a lovely scent and natural touch, especially for a spa or self-care basket.
Common Mistakes to Avoid
Overstuffing Your Basket
A common pitfall is trying to cram too many items into one basket. This makes it look cluttered and uninviting, losing its visual appeal. Instead, focus on quality over quantity and allow each item a bit of breathing room to be appreciated.
If you have many items, consider using a larger container or splitting them into two smaller, themed baskets. A little negative space can make a big difference in presentation.
Ignoring the Theme
A beautiful basket feels cohesive and intentional. Mixing disparate items without a clear theme can make it look like a random collection of things. Even if the items are wonderful, they lose impact when they don’t relate.
Always start with a theme in mind, whether it’s “Relaxation,” “Gourmet Coffee,” “New Baby Essentials,” or “Cozy Winter Evening.” This guides your selection and ensures everything works together beautifully.
Skimping on Filler
Insufficient filler makes items sink, disappear, or shift around, leading to a messy and unfinished look. It’s crucial for both presentation and structural integrity. A lack of filler also makes the basket appear sparse.
Be generous with your filler. Fluff it well and use enough to create a firm, elevated base for all your gifts. It’s better to have a little too much than not enough.
Forgetting the Personal Touch
A gift basket should feel personal and made with love, not like something bought off a shelf. Omitting a handwritten note or a small, unique embellishment can make it feel generic. The recipient should feel understood and cherished.
Always include a personalized card or tag. Think about adding a small item that specifically relates to an inside joke or a shared memory. These details transform a gift into a truly memorable gesture.
Troubleshooting
My basket looks flat and uninspired.
This often happens when items are placed on a flat surface without proper elevation. The key is to create height and dimension. Ensure you’ve used plenty of fluffed filler to lift items from the bottom of the container.
Try placing taller items at the back and gradually decreasing height towards the front. Use smaller pieces of filler or even crumpled tissue paper underneath individual items to prop them up, creating varying levels and visual interest.
My cellophane looks messy and wrinkled.
Wrinkled cellophane can detract from an otherwise beautiful basket. This usually occurs if the cellophane isn’t large enough or if it’s not gathered tightly enough at the top. Ensure your cellophane is generously sized.
When gathering, pull it up firmly and evenly around the entire basket before securing it with a twist tie. If you have excess, you can carefully trim the very top after tying, leaving enough for a nice, full gathered look.
Items are shifting around inside the basket.
This is a common issue if the filler isn’t compact enough or if items aren’t nested securely. The goal is for everything to be snug. Re-adjust your filler, pressing it down firmly to create a stable base for each item.
For particularly wobbly items, you can use a small piece of double-sided tape on the bottom to adhere it to the filler or the container itself. Alternatively, strategically place other items around it to create a supportive “wall.”
Key Takeaways
- Start with a Theme: A cohesive theme guides your selection and makes your basket feel intentional and special.
- Layer with Purpose: Use filler generously and arrange items from tallest/heaviest at the back to smallest at the front to create depth.
- Personalize Every Detail: From the container to the gift tag, infuse your basket with touches that speak directly to the recipient.
- Finish with Flair: High-quality cellophane, a beautiful ribbon, and charming embellishments elevate your basket to a professional level.
- Quality Over Quantity: A few well-chosen, beautifully presented items are far more impactful than a basket overflowing with random goods.
Frequently Asked Questions
What can I use instead of a traditional basket?
The possibilities are endless! Consider a stylish tote bag, a wooden crate, a ceramic planter, a hatbox, a reusable storage bin, a decorative colander, or even a large mug. The best alternative container is one that the recipient can reuse and enjoy long after the gifts are gone.
How do I make my basket look fuller without adding more gifts?
The secret lies in generous and well-fluffed filler. Use plenty of crinkle paper or tissue paper to create a high base, lifting all your gifts. Arrange items at varying heights and angles, and use smaller, inexpensive items like candies, tea bags, or decorative picks to fill in any gaps and add visual interest.
Can I make a gift basket for any occasion?
Absolutely! Gift baskets are incredibly versatile. You can create them for birthdays, baby showers, holidays, housewarmings, get-well wishes, thank-you gifts, teacher appreciation, or even just because. The key is tailoring the theme and contents to the specific occasion and recipient.
How do I transport a finished gift basket without it getting ruined?
Once wrapped in cellophane and tied with a ribbon, your basket should be quite secure. For added stability, place the basket in a sturdy cardboard box that fits snugly around its base. If driving, place it on a flat surface in your car, like the floor of the passenger seat, or secure it with a seatbelt to prevent shifting during turns.
Our Top Recommended Finds
- Crinkle Cut Shredded Paper: Essential for adding volume and a professional base to your gifts.
- Clear Cellophane Roll: A generous roll ensures you have enough for multiple projects and allows for easy, seamless wrapping.
- Assorted Satin Ribbon Set: Having a variety of colors and widths on hand means you’ll always have the perfect finishing touch.
Your Gifting Journey Begins!
Crafting a beautiful gift basket is more than just assembling items; it’s about weaving together thoughtfulness, creativity, and a touch of magic. Each basket you make becomes a celebration in itself, a testament to your care and imagination. Imagine the joy on their face as they uncover each carefully chosen treasure!
Now that you have the tools and inspiration, why not plan your next unforgettable gift? Whether it’s a cozy “hygge” basket for a friend’s birthday, a vibrant “new beginnings” basket for a baby shower, or a festive holiday treat, the possibilities are endless. Start gathering your ideas today and let your creativity shine!