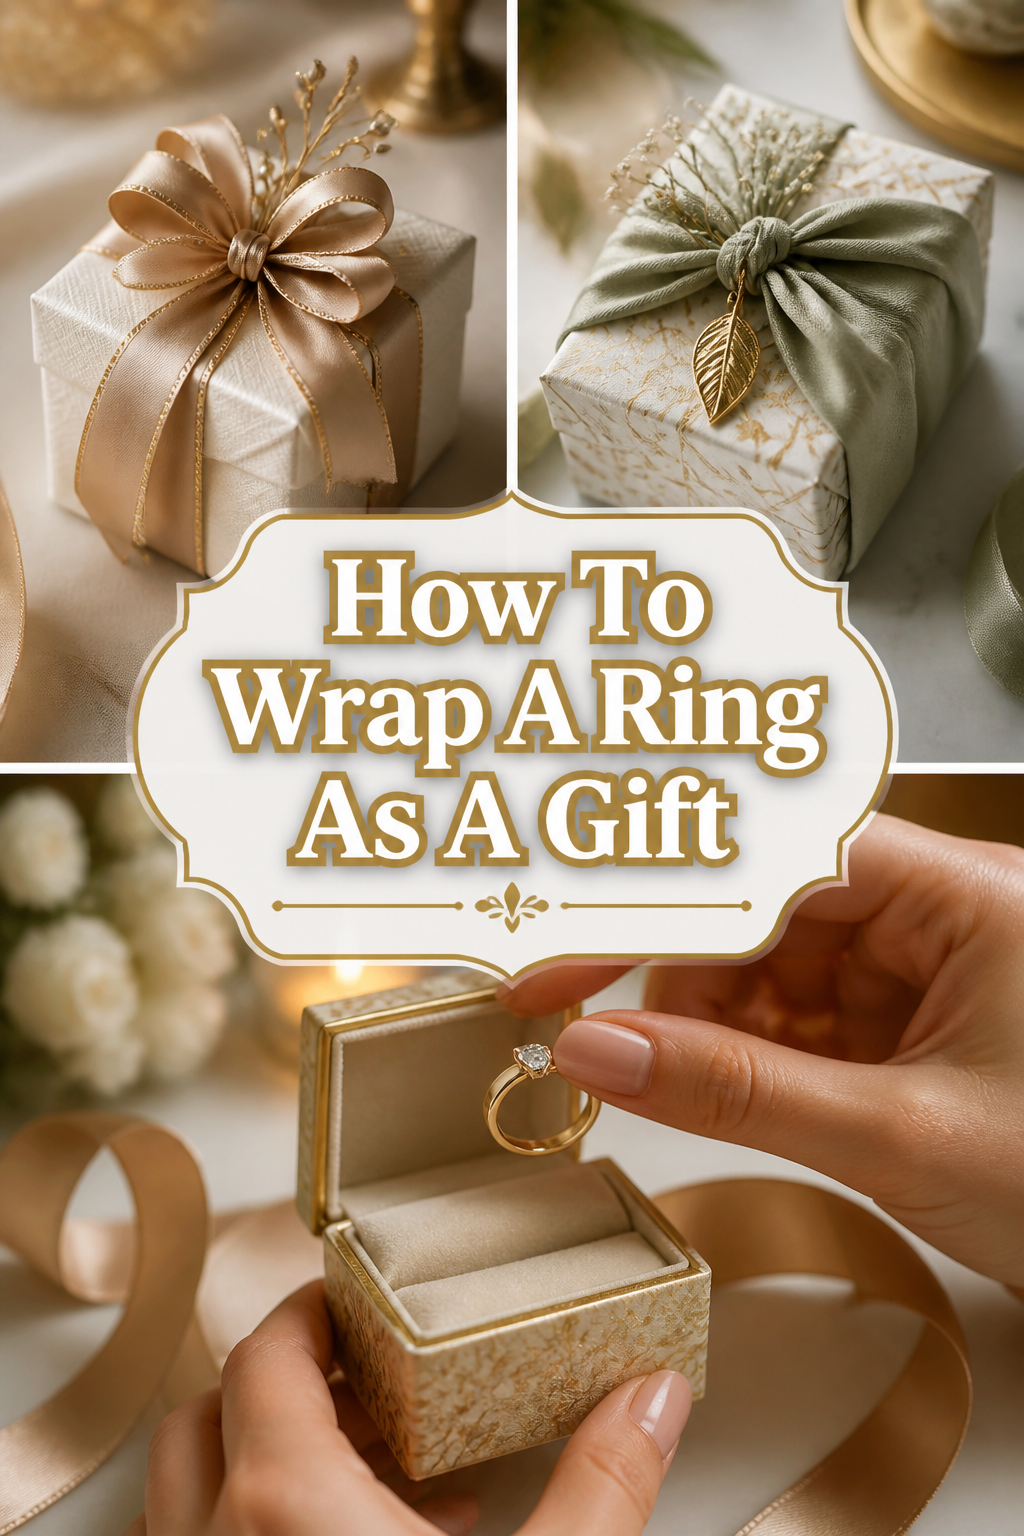
💍 How To Wrap A Ring As A Gift
📋 The Event Planner's Essential Toolkit
Whether you're throwing a massive birthday bash or an intimate baby shower, the right tools make execution effortless. These are the 5 essential items that professional event coordinators and DIY party hosts consistently rely on to pull off flawless celebrations without the stress.
🎈 Electric Dual-Nozzle Balloon Pump
The absolute lifeline for creating those trending balloon arches and garlands that everyone loves. This dual-nozzle pump lets you inflate hundreds of balloons in a fraction of the time, saving your lungs and transforming hours of prep work into minutes.
🛡️ Command Clear Party Hooks & Strips
The secret to magazine-worthy venue decorations without losing your security deposit. Professional planners stock up on these clear, damage-free hooks to hang banners, string lights, and paper lanterns securely on walls and ceilings, removing cleanly when the party is over.
🧁 Wilton Tiered Cupcake & Dessert Stand
The easiest way to make a simple dessert table look professionally catered. This customizable, multi-tier display stand gives crucial height and dimension to your treats, effortlessly elevating the presentation of cupcakes, cookies, or appetizers at any gathering.
🚂 Heavy-Duty Collapsible Utility Wagon
The unsung hero of off-site parties, park birthdays, and trunk-or-treats. This rugged folding wagon hauls folding chairs, coolers, and mountains of decor from your car to the venue in one trip, completely eliminating the exhausting pre-party back-and-forth hauling.
📓 Clever Fox Event Planner Organizer
The ultimate command center for keeping your sanity intact while hosting. Dedicated sections for guest lists, budget tracking, vendor contacts, and day-of timelines ensure that not a single crucial detail falls through the cracks before the big day.
I remember the first time I helped my brother prepare a ring for his anniversary.
The ring was stunning, but the plain cardboard box it came in felt a little underwhelming for such a big milestone.
We spent the afternoon experimenting with silk ribbons and dried petals until the presentation finally matched the beauty of the jewelry inside.
Since then, I have become obsessed with the “unboxing experience” and how it can turn a simple gift into a lifelong memory.
In this guide, I will share everything I have learned about creating Pinterest-worthy ring packaging that feels personal and high-end.

Quick Overview
Wrapping a ring is an art form that focuses on small details and tactile textures.
You are not just covering a box; you are building anticipation and telling a story through your choice of materials.
- Time needed: 20-30 minutes
- Difficulty: Beginner
- What you’ll need: A ring box, high-quality wrapping paper, double-sided tape, silk or velvet ribbon, and decorative accents like wax seals or dried florals.
Step-by-Step Instructions
Step 1: Define Your Celebration Aesthetic
Start by considering the occasion and the personality of the person receiving the ring.
A birthday gift might call for vibrant colors and playful patterns, while a bridal shower gift often leans toward soft pastels and romantic textures.
For a modern, “clean girl” aesthetic, think about using monochromatic tones like cream, beige, or sage green.
If you are going for a vintage or “Dark Academia” vibe, reach for deep emerald greens, burgundy velvet, and aged gold accents.
Choosing a theme early helps you stay consistent with your ribbon and paper choices.
Pro Tip: Look at the recipient’s favorite jewelry style for inspiration. If they love yellow gold, use warm-toned accents like champagne ribbon or gold leaf.
Step 2: Choose the Perfect Vessel
Evaluate the box that the ring originally came in to see if it fits your vision.
Sometimes the standard jeweler’s box is a bit clunky or features branding that clashes with your aesthetic.
You can upgrade the presentation by purchasing a vintage-style velvet hex box or a hand-carved wooden box.
If you want to be truly unique, consider using a hollowed-out vintage book or a beautiful porcelain seashell for a beach-themed gift.
The weight and texture of the box contribute significantly to the “luxury” feel of the gift.
Step 3: Secure and Cushion the Ring
Ensure the ring does not rattle around inside the box during transport.
A loose ring can feel “cheap” and might even get scratched if it hits the sides of the container.
If the box doesn’t have a snug slit, tuck a small piece of silk or a few rose petals around the band.
For a whimsical touch, you can rest the ring on a bed of preserved moss or tiny dried baby’s breath.
This adds a layer of sensory delight when the box is finally opened.
Pro Tip: Give the box a gentle shake. If you hear a “clink,” add more padding until the ring is perfectly silent and secure.
Step 4: Master the Seamless Wrap
Cut your wrapping paper to the exact size needed for the small box.
One of the biggest mistakes people make is using too much paper, which leads to bulky, messy corners.
Lay the box face down and bring the paper up the sides, ensuring there is only about a half-inch of overlap.
Use double-sided tape for every single seam so that no “plastic” sheen shows on your beautiful paper.
Press the edges firmly to create crisp, sharp lines that look professionally done.
Step 5: Layer Your Textures
Wrap a high-quality ribbon around the box to add depth and elegance.
Instead of standard curling ribbon, choose a material with a beautiful drape, such as frayed-edge silk or heavy velvet.
You can do a classic “Tiffany-style” cross-wrap or a simple single loop for a minimalist look.
If the box is very small, a thin cord of metallic twine can look incredibly chic without overwhelming the package.
Don’t be afraid to mix textures, like a rough linen paper paired with a smooth satin ribbon.
Step 6: Add the Final Flourish
Personalize the gift with a decorative element that sits on top of the ribbon.
A wax seal is one of the most effective ways to make a gift look expensive and “Pinterest-worthy.”
You can use a stamp with the recipient’s initial or a botanical design like a fern or a rose.
Tuck a small sprig of dried lavender or a tiny “To/From” tag handwritten in calligraphy under the ribbon.
These small additions show that you put thought into every single square inch of the presentation.
Pro Tip: Use a tiny dot of hot glue or a glue dot to keep your wax seal or floral sprig perfectly centered on the box.
Common Mistakes to Avoid
The Giant Box Illusion
Putting a tiny ring box inside a massive shipping box can feel like a letdown for the recipient.
While the “nesting doll” surprise can be fun, it often takes away from the elegance of a fine jewelry gift.
If you want to make the gift feel larger, use a medium-sized gift bag filled with plenty of high-quality tissue paper instead of a giant box.
This maintains the mystery while keeping the focus on the precious item inside.
Using Low-Quality Tape
Standard clear tape can yellow over time and often peels away from textured or glittery papers.
It also creates a visible “seam” that breaks the visual flow of your beautiful wrapping paper.
Always opt for double-sided permanent tape or a high-quality “magic” tape that disappears on the surface.
This gives your gift a seamless, high-end look that mimics professional boutique wrapping.
Ignoring the Interior Presentation
Many people spend all their energy on the outside of the box and forget what happens when it is opened.
If the ring is sitting on a piece of cheap, yellowing foam, it will diminish the “wow” factor.
Take a moment to replace the foam insert with a piece of velvet or a small silk pillow.
The interior should feel just as curated and thoughtful as the exterior.
Troubleshooting
The Paper is Tearing at the Corners
This usually happens if the paper is too thin or if you are pulling it too tightly over sharp box edges.
To fix this, you can reinforce the inside of the paper with a small piece of tape before folding.
Alternatively, switch to a heavier weight paper like 100gsm matte stock or handmade cotton paper.
If the tear is already there, cover it up with a strategically placed ribbon or a decorative sticker.
The Ribbon Keeps Sliding Off
Tiny boxes are notoriously difficult to tie because there is very little surface area for the ribbon to grip.
You can solve this by placing a small glue dot on the bottom of the box before you start wrapping the ribbon.
This holds the ribbon in place while you tie the bow on the top.
You can also try using a “notched” box or a ribbon with a bit of “tooth,” like grosgrain, which stays in place better than slippery satin.
The Box is Too Small to Wrap Neatly
If the box is smaller than two inches, traditional wrapping can look messy and cluttered.
In this case, skip the wrapping paper entirely and use a small fabric pouch made of velvet or linen.
Place the box inside the pouch and tie the drawstrings with a beautiful gold cord.
This provides a clean, sophisticated look that is much easier to manage than tiny folds of paper.
Key Takeaways
- Focus on texture: Use silk, velvet, and handmade paper to create a tactile experience.
- Scale matters: Keep your folds tight and your ribbon proportional to the small size of the ring box.
- Security is key: Ensure the ring is cushioned so it doesn’t move or make noise inside the container.
- Add a signature: Use wax seals or dried florals to give the gift a unique, artisanal touch.
- Details count: Use double-sided tape for a seamless, professional finish.
Frequently Asked Questions
Can I wrap a ring without a box?
While a box provides the best protection, you can wrap a ring in a small velvet pouch or tie it to a sturdy card.
If you use a card, make sure the ring is looped through a ribbon that is firmly attached to the paper.
This works beautifully for casual gifts or when you want to include the ring inside a greeting card.
What is the best paper for small gifts?
Handmade deckled-edge paper or high-quality matte gift wrap works best because they fold cleanly.
Avoid very thick cardstock, as it is difficult to get sharp corners on a tiny box.
Tissue paper can also work if you layer it several times to create a soft, “cloud-like” effect.
How do I make a cheap ring box look expensive?
You can transform a basic box by wrapping it in a piece of scrap velvet or silk fabric instead of paper.
Secure the fabric with hot glue on the bottom and add a heavy metallic ribbon.
The weight and sheen of the fabric will immediately elevate the perceived value of the gift.
Our Top Recommended Finds
- Velvet Hexagon Ring Boxes: These come in dozens of colors and provide an instant vintage-luxury feel.
- Satin Silk Ribbon Spools: Look for “hand-dyed” options with frayed edges for a romantic, organic look.
- Wax Seal Starter Kit: A gold or rose-gold wax set allows you to add a custom “seal of approval” to any gift.
Elevate Your Gifting Game
Now that you have the tools to create a stunning presentation, it is time to put these ideas into practice.
The beauty of a gift is often found in the effort you put into the presentation, showing the recipient how much they truly mean to you.
Whether it is a birthday, an anniversary, or a “just because” surprise, your hand-wrapped ring will be the star of the show.
Start gathering your favorite ribbons and papers today to create a moment that will be remembered long after the box is opened.