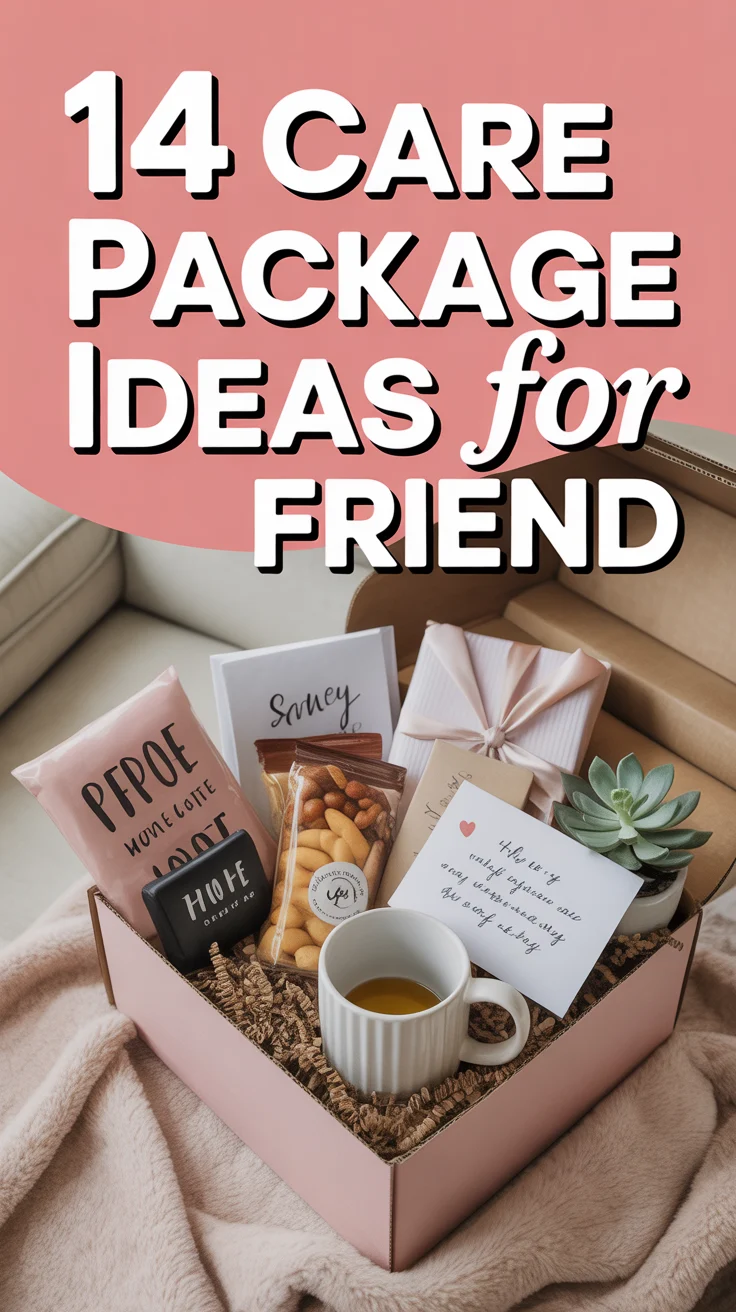
🎁 How To Wrap A Jewelry Box Small Gifts
📋 The Event Planner's Essential Toolkit
Whether you're throwing a massive birthday bash or an intimate baby shower, the right tools make execution effortless. These are the 5 essential items that professional event coordinators and DIY party hosts consistently rely on to pull off flawless celebrations without the stress.
🎈 Electric Dual-Nozzle Balloon Pump
The absolute lifeline for creating those trending balloon arches and garlands that everyone loves. This dual-nozzle pump lets you inflate hundreds of balloons in a fraction of the time, saving your lungs and transforming hours of prep work into minutes.
🛡️ Command Clear Party Hooks & Strips
The secret to magazine-worthy venue decorations without losing your security deposit. Professional planners stock up on these clear, damage-free hooks to hang banners, string lights, and paper lanterns securely on walls and ceilings, removing cleanly when the party is over.
🧁 Wilton Tiered Cupcake & Dessert Stand
The easiest way to make a simple dessert table look professionally catered. This customizable, multi-tier display stand gives crucial height and dimension to your treats, effortlessly elevating the presentation of cupcakes, cookies, or appetizers at any gathering.
🚂 Heavy-Duty Collapsible Utility Wagon
The unsung hero of off-site parties, park birthdays, and trunk-or-treats. This rugged folding wagon hauls folding chairs, coolers, and mountains of decor from your car to the venue in one trip, completely eliminating the exhausting pre-party back-and-forth hauling.
📓 Clever Fox Event Planner Organizer
The ultimate command center for keeping your sanity intact while hosting. Dedicated sections for guest lists, budget tracking, vendor contacts, and day-of timelines ensure that not a single crucial detail falls through the cracks before the big day.
There is something truly magical about a beautifully wrapped gift. It’s not just about the present inside, but the love and anticipation built into every fold and ribbon. I’ve spent countless hours perfecting gift presentations, transforming simple boxes into works of art.
This guide shares all my secrets, ensuring your small gifts always make a big impression.

Quick Overview
Transforming a humble jewelry box into a dazzling presentation is a joyful art. You’ll learn to measure perfectly, fold with precision, and adorn with creative flair. Get ready to elevate your gift-giving game and spark delight.
- Time needed: 15-30 minutes (depending on embellishments)
- Difficulty: Beginner
- What you’ll need: Wrapping paper, scissors, tape, ribbon, optional decorations
Step-by-Step Instructions
Step 1: Gather Your Essentials
Before you begin, lay out all your materials on a clean, flat surface. This includes your chosen wrapping paper, sharp scissors, and a reliable tape dispenser. Having everything within reach makes the process smooth and enjoyable.
Think about the occasion and theme when selecting your paper and embellishments. A baby shower might call for soft pastels and delicate ribbons, while a birthday party could shine with vibrant colors and playful confetti.
Pro Tip: Consider the recipient’s personality when choosing your wrapping supplies. A minimalist friend might appreciate a simple, elegant paper, while a maximalist might adore layers of texture and sparkle.
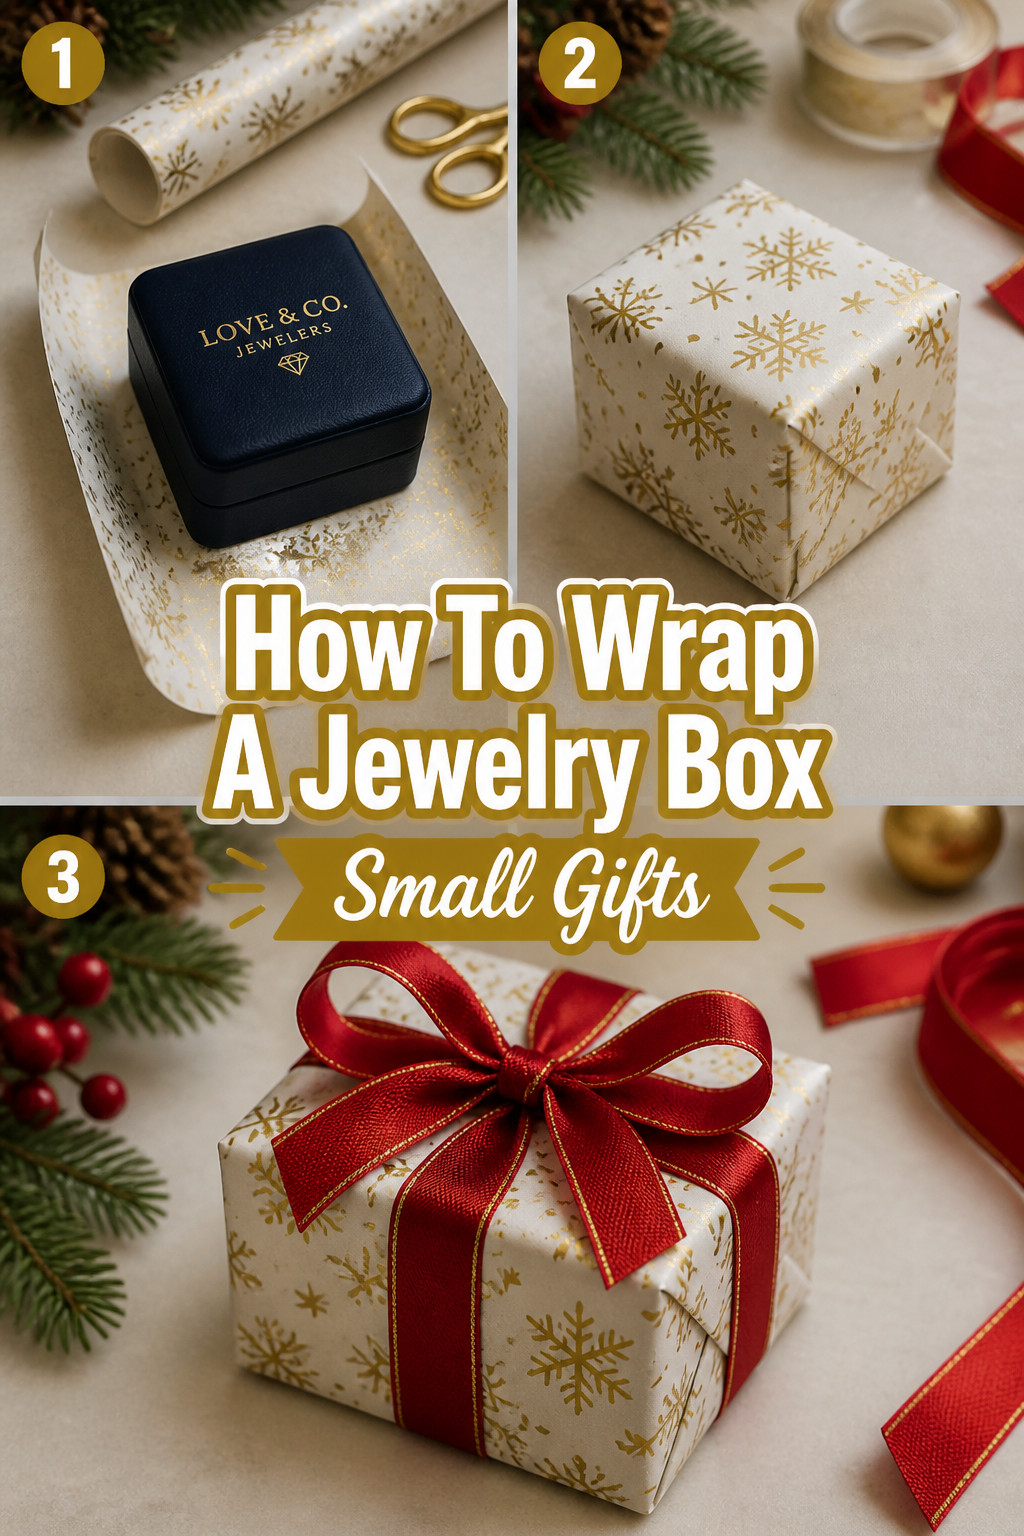
Step 2: Measure Your Paper Perfectly
Lay your wrapping paper pattern-side down on your work surface. Place your jewelry box in the center of the paper. This initial placement is crucial for minimizing waste and ensuring a snug fit.
To measure the length, bring one side of the paper up and over the box. It should overlap the opposite side by about half an inch. For the width, allow the paper to extend past the ends of the box by roughly one and a half times the box’s height on each side.
Step 3: Position the Box and Secure the First Side
Once your paper is perfectly measured, place the box squarely in the middle. Bring one long edge of the paper up and over the box. Use a small piece of double-sided tape or a neatly folded visible tape piece to secure this edge to the box.
Ensure the paper is taut but not so tight that it wrinkles the box. This initial adhesion creates a clean foundation for the rest of your wrapping.
Step 4: Fold and Secure the Overlap
Now, bring the opposite long edge of the paper up and over the box. If you’ve measured correctly, it should overlap the first secured edge by about half an inch. Create a crisp, clean fold along this overlapping edge.
Secure this folded edge with tape, either double-sided for a seamless look or a single piece of clear tape applied neatly. The key is to keep this seam straight and tight along the box’s length.
Step 5: Create Crisp Ends
This step is where many go wrong, but it’s surprisingly simple to master. On one end of the box, gently push the excess paper inwards, creating two triangular folds on the sides. These folds should naturally meet at the corners of the box.
Now, bring the top flap down firmly against the end of the box, creating a sharp crease. Then, bring the bottom flap up, overlapping the top flap slightly.
Step 6: Tape Down the Ends Neatly
Once your end flaps are perfectly creased, secure them with tape. For a professional finish, use small pieces of double-sided tape hidden beneath the overlapping flap. Alternatively, clear tape applied discreetly works wonderfully.
Repeat this precise folding and taping process for the other end of the jewelry box. You’ll notice a significant difference in the overall presentation when these folds are crisp and clean.
Step 7: Add Ribbons and Bows
Now for the fun part: embellishment! Choose a ribbon that complements your wrapping paper and the gift’s occasion. For a classic look, wrap the ribbon around the length and width of the box, tying a neat bow on top.
Consider layering different widths or textures of ribbon for a luxurious feel. A sheer organza ribbon over a satin one adds beautiful depth.
Pro Tip: For a truly Pinterest-worthy touch, try tying your ribbon into a more elaborate bow like a “four-loop” or “florist” bow. There are many simple tutorials online to guide you.
Step 8: Embellish with Flair
This is where your creativity truly shines, transforming a wrapped box into a memorable gift. Attach a small sprig of fresh eucalyptus for a natural, rustic feel, perfect for a winter holiday or an elegant birthday. Consider a tiny ornament for Christmas gifts, or a miniature baby rattle for a baby shower.
Hand-stamped gift tags add a personal touch and show extra care. You can use rubber stamps with initials, a small message, or a decorative motif. For a birthday, attach a tiny balloon, or for a bridal shower, a delicate paper flower.
Think about incorporating elements that tie into your party theme. If it’s a garden party, add a miniature silk flower or a tiny seed packet. For a travel-themed celebration, a small luggage tag or a vintage map cutout works beautifully.
Step 9: Personalize with a Thoughtful Tag
No gift is complete without a heartfelt message. Write a personal note on a beautiful gift tag. This isn’t just about identifying the recipient; it’s about conveying your warm wishes and the meaning behind the gift.
Consider a handwritten quote, a short poem, or a simple “Thinking of you.” This final touch makes the gift truly yours and adds immense sentimental value.
Common Mistakes to Avoid
Using Too Much Paper
A common pitfall is cutting an excessive amount of wrapping paper. This leads to bulky, uneven folds and a messy appearance. It also wastes precious paper, which isn’t ideal for our planet or your wallet. Always measure precisely, erring on the side of slightly less rather than too much. A snug fit creates the most elegant outcome.
Skipping Crisp Folds
Rushed or sloppy folds instantly diminish the gift’s presentation. Soft, rounded edges make the gift look unkempt and less thoughtfully prepared. Take your time to create sharp, defined creases, especially at the corners and along the seams. This attention to detail elevates the entire look and feels incredibly professional.
Over-Taping
While tape is essential, using too much can make a gift look cluttered and challenging to open. Visible tape every few inches detracts from the beauty of the paper and ribbon. Aim for minimal, strategically placed tape, ideally double-sided, to maintain a clean and seamless finish.
Ignoring Ribbon Proportion
The size and style of your ribbon should complement the jewelry box and its wrapping. A thick, wide ribbon on a tiny box can overwhelm it, making it look disproportionate. Conversely, a very thin ribbon on a larger box might appear lost. Choose ribbons that are in harmony with the gift’s dimensions and the overall aesthetic.
Troubleshooting
Paper Tears
If your wrapping paper tears during the process, don’t despair! For small tears, a discreet piece of clear tape applied from the inside can often mend it invisibly. For larger tears or unsightly areas, consider covering the imperfection with an embellishment. A well-placed bow, a decorative sticker, or a small floral sprig can cleverly hide the damage and add to the charm.
Uneven Sides
Uneven side folds are usually a result of imprecise initial measuring or not keeping the paper taut. To fix this, gently un-tape the problematic side. Re-fold the paper, ensuring it’s pulled firmly and evenly across the box before re-taping. Using a ruler or the edge of the box as a guide can help achieve perfectly straight lines.
Ribbon Slips Off
A ribbon that constantly slips off can be frustrating. This often happens if the ribbon isn’t tied tightly enough or if the box has a very smooth, slippery surface. To prevent this, secure the ribbon in place with a tiny dot of hot glue (applied carefully to the back of the box where it won’t be seen) or a small piece of double-sided tape where the ribbon crosses on the underside. You can also thread a decorative pin through the ribbon on the top of the box for extra security and style.
Key Takeaways
- Precise measurement is the foundation of a beautifully wrapped gift, minimizing waste and ensuring neatness.
- Crisp, sharp folds at every seam and corner elevate the gift’s appearance, demonstrating care and attention.
- Strategic and minimal use of tape creates a clean, professional finish, enhancing the overall aesthetic.
- Embellishments like ribbons, tags, and small decorative elements personalize the gift and reflect the occasion.
- Considering the recipient’s style and the event’s theme adds a thoughtful, Pinterest-worthy dimension to your wrapping.
- Practice makes perfect; enjoy the process of transforming a simple box into a treasured presentation.
Frequently Asked Questions
What’s the best tape to use for wrapping?
For the cleanest, most professional look, double-sided tape is your best friend. It hides seams perfectly, giving a seamless finish. If you’re using visible tape, choose clear, matte tape that blends into the paper. Avoid shiny, thick tapes that detract from the overall aesthetic.
How do I wrap an oddly shaped jewelry box?
While this guide focuses on standard rectangular boxes, oddly shaped jewelry boxes require a different approach. For unique shapes like hearts or circles, consider using fabric wraps, organza bags, or creating a custom gift bag from heavy paper. You can also place the item in a slightly larger, standard-shaped box and then wrap that.
Can I reuse wrapping paper?
Absolutely! Reusing wrapping paper is an eco-friendly and creative choice. Carefully unwrap gifts, smoothing out any creases, and store the paper flat. For smaller pieces, consider cutting them into strips for bows, decorative accents, or creating unique gift tags. It’s a wonderful way to extend the life of beautiful designs.
How do I make a perfect bow?
Creating a perfect bow takes a little practice but is very rewarding. Start by leaving ample ribbon length. Create two loops, crossing one over the other, then thread one loop through the center, pulling tight. Adjust the loops to be even and fluffy. Online tutorials with visual aids can be incredibly helpful for mastering different bow styles.
Our Top Recommended Finds
- High-Quality Double-Sided Tape: Essential for invisible seams and a polished finish that truly elevates your wrapping.
- Assorted Fabric Ribbons: A collection of satin, grosgrain, and sheer ribbons in various widths provides endless creative possibilities for any occasion.
- Customizable Gift Tags & Stamps: Blank cardstock tags and a set of alphabet or decorative stamps allow for personalized messages and unique designs.
Embrace the Art of Thoughtful Gifting
Wrapping a small jewelry box is more than just covering an item; it’s an act of love, a prelude to joy. Each fold, each ribbon, each tiny embellishment tells a story of care and anticipation. You’re not just giving a gift; you’re creating a moment.
Let this guide inspire your next birthday celebration, baby shower, or holiday gathering. Imagine the delight on their face as they receive a gift as beautiful on the outside as it is precious on the inside. Start planning your next Pinterest-worthy presentation today, and infuse every celebration with your unique, heartfelt touch.