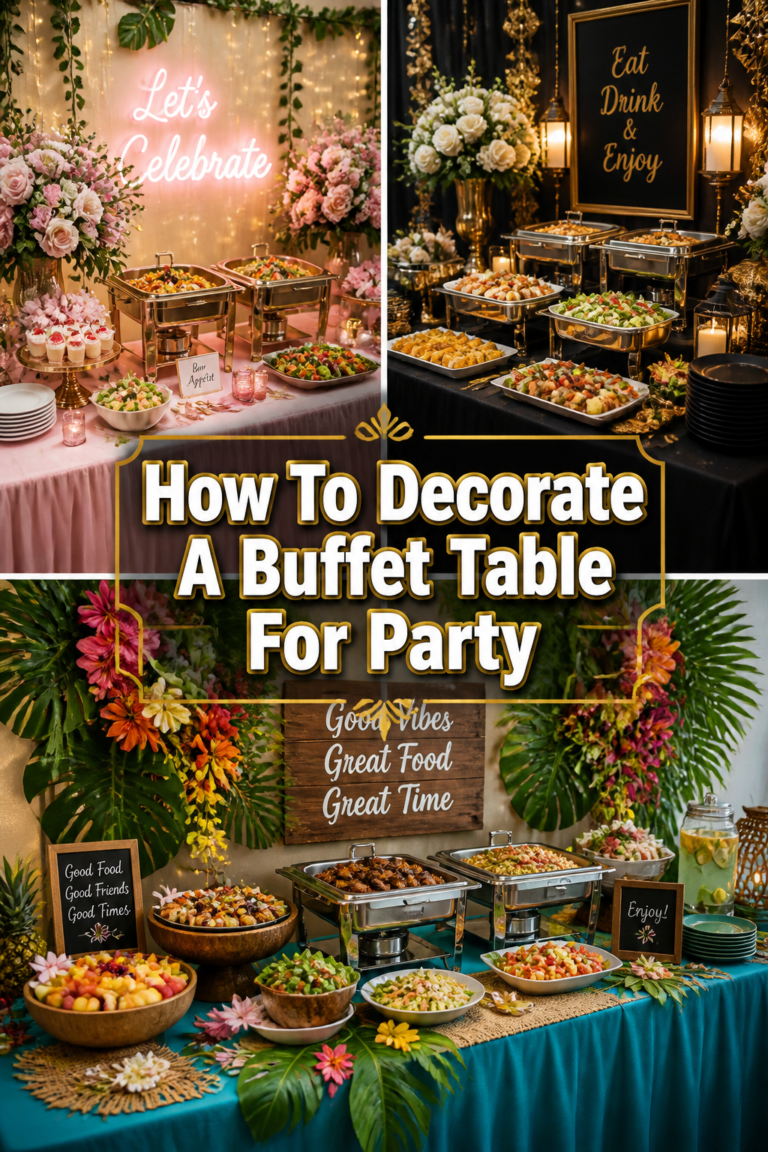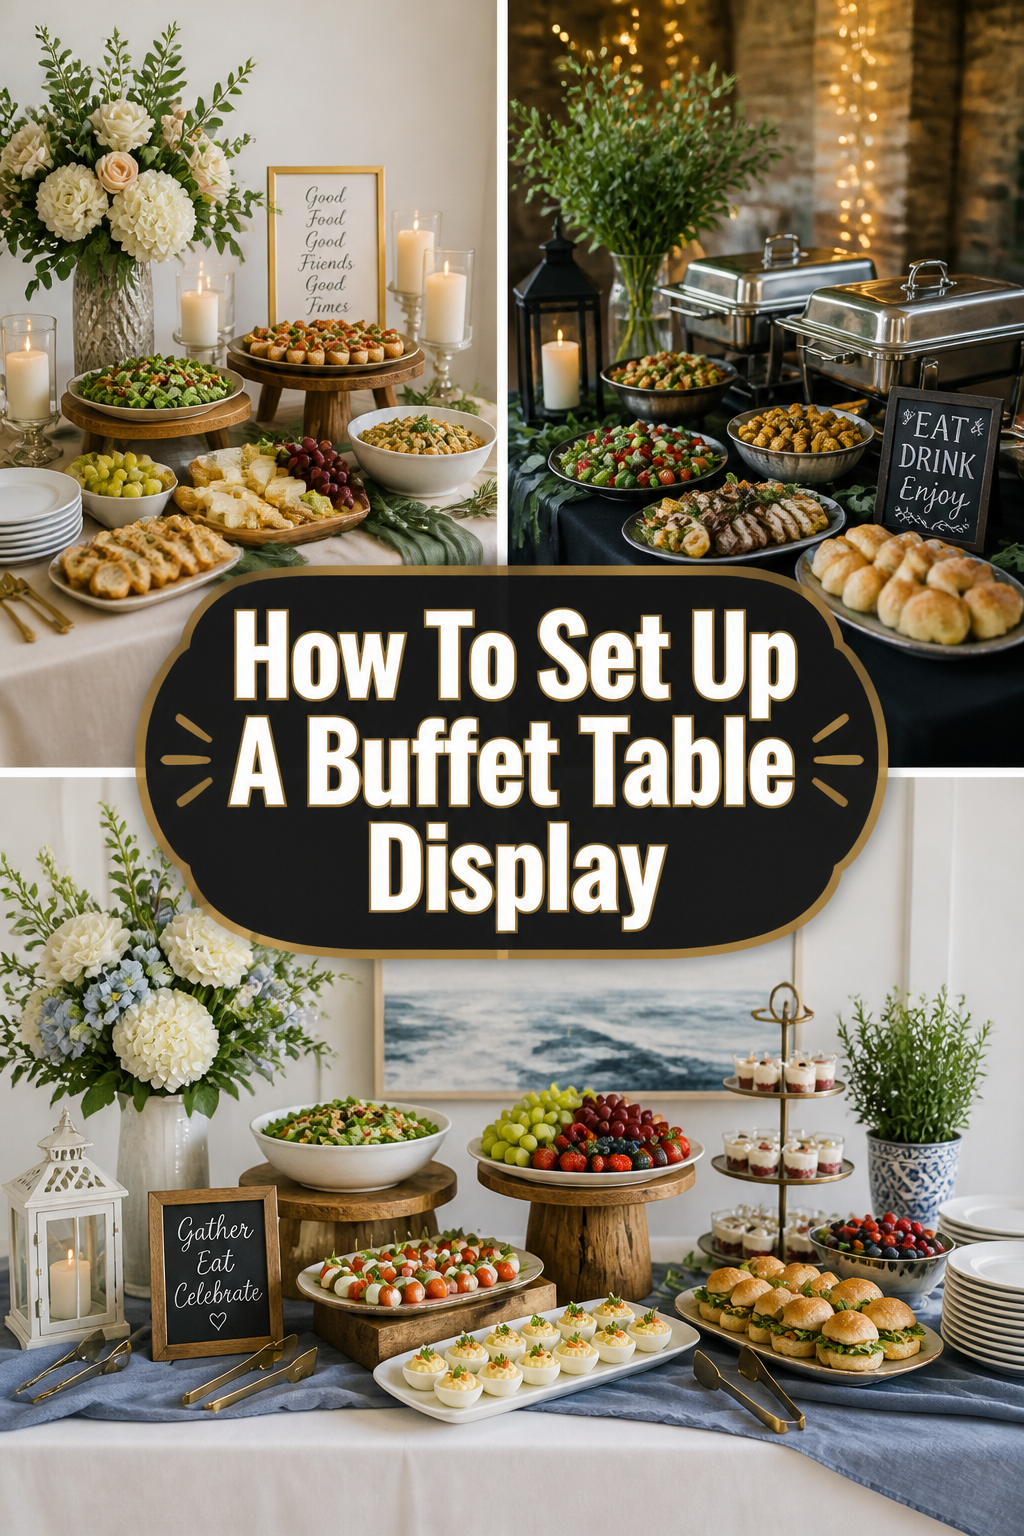
✨ How To Set Up A Buffet Table Display
📋 The Event Planner's Essential Toolkit
Whether you're throwing a massive birthday bash or an intimate baby shower, the right tools make execution effortless. These are the 5 essential items that professional event coordinators and DIY party hosts consistently rely on to pull off flawless celebrations without the stress.
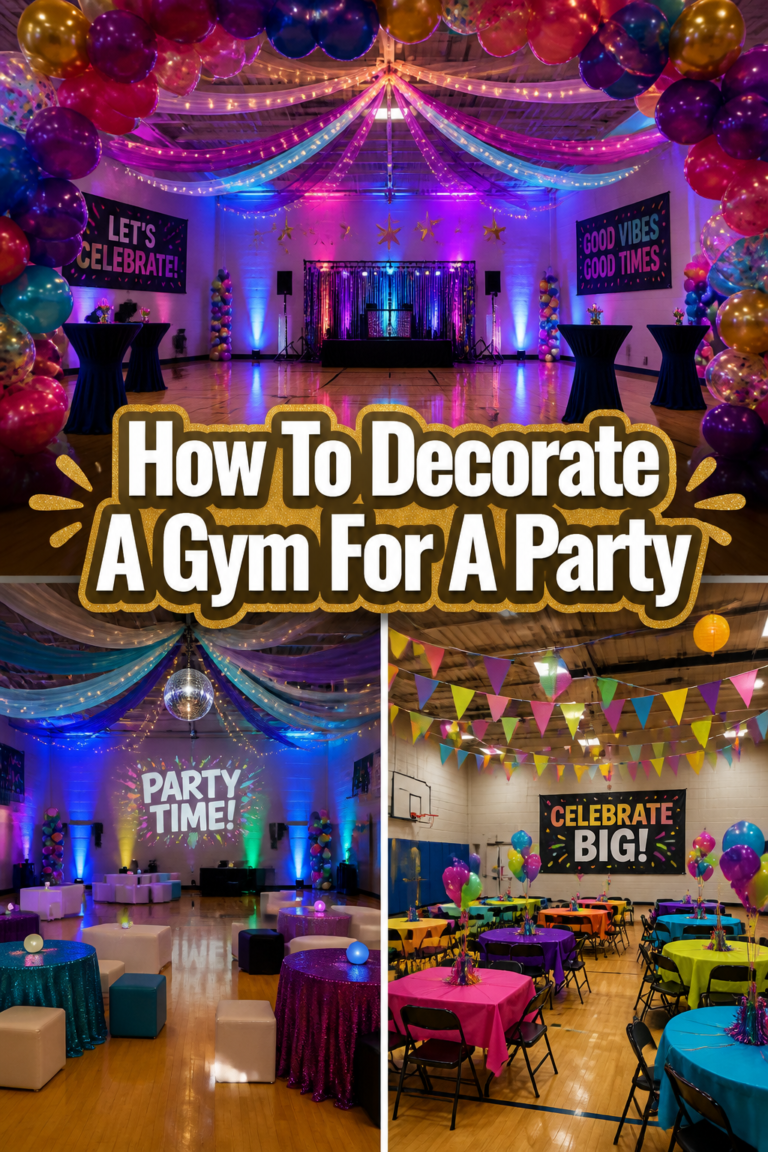
🎈 Electric Dual-Nozzle Balloon Pump
The absolute lifeline for creating those trending balloon arches and garlands that everyone loves. This dual-nozzle pump lets you inflate hundreds of balloons in a fraction of the time, saving your lungs and transforming hours of prep work into minutes.
🛡️ Command Clear Party Hooks & Strips
The secret to magazine-worthy venue decorations without losing your security deposit. Professional planners stock up on these clear, damage-free hooks to hang banners, string lights, and paper lanterns securely on walls and ceilings, removing cleanly when the party is over.
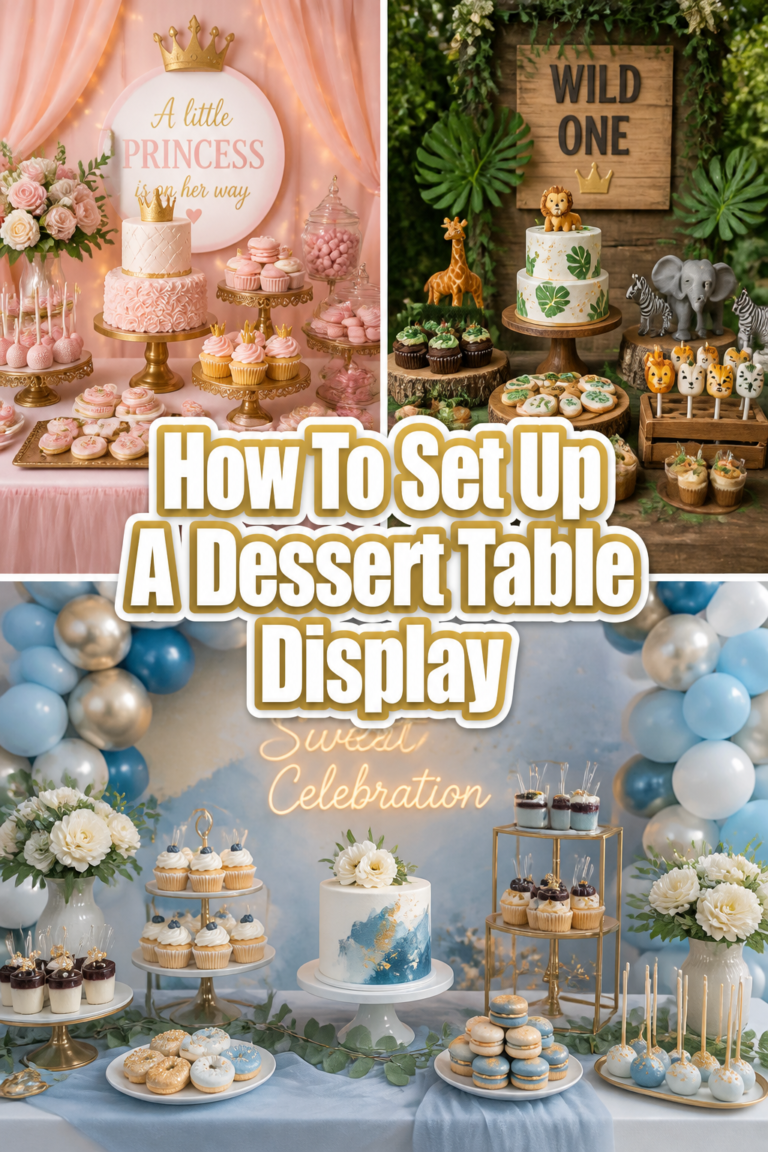
🧁 Wilton Tiered Cupcake & Dessert Stand
The easiest way to make a simple dessert table look professionally catered. This customizable, multi-tier display stand gives crucial height and dimension to your treats, effortlessly elevating the presentation of cupcakes, cookies, or appetizers at any gathering.
🚂 Heavy-Duty Collapsible Utility Wagon
The unsung hero of off-site parties, park birthdays, and trunk-or-treats. This rugged folding wagon hauls folding chairs, coolers, and mountains of decor from your car to the venue in one trip, completely eliminating the exhausting pre-party back-and-forth hauling.
📓 Clever Fox Event Planner Organizer
The ultimate command center for keeping your sanity intact while hosting. Dedicated sections for guest lists, budget tracking, vendor contacts, and day-of timelines ensure that not a single crucial detail falls through the cracks before the big day.
There’s a special kind of magic that happens when friends and family gather around a beautifully laid table.
I remember my very first baby shower for my sister, feeling overwhelmed by all the details, until I realized the buffet table could be a centerpiece of joy and creativity.
This guide shares all the practical tips and delightful touches I’ve learned over countless celebrations, helping you craft a display that truly wows your guests and makes your event unforgettable.
Quick Overview
Transforming a simple table into a stunning buffet display is easier than you think. You’ll create a visually appealing, functional, and memorable spread that reflects your unique celebration.
- Time needed: 1-2 hours (for setup, excluding cooking time)
- Difficulty: Beginner
- What you’ll need: A table, tablecloths, serving dishes, risers, decorations, and your delicious food.
Step-by-Step Instructions
Step 1: Envision Your Celebration & Guest Experience
Every memorable party starts with a clear vision. Think about the heart of your celebration – is it a whimsical birthday, a cozy holiday gathering, or an elegant anniversary?
Consider your guest list and their preferences, ensuring your buffet caters to everyone while expressing your unique style.
Define your theme. A theme ties everything together, from food choices to decor. For a baby shower, imagine “Twinkle, Twinkle Little Star” with celestial elements, or a “Woodland Creatures” theme for a first birthday.
Sketch out your layout. A simple drawing can help you visualize the flow and placement of dishes. This early planning saves time and stress later on.
Pro Tip: Browse Pinterest for “buffet table ideas [your theme]” to gather endless inspiration. Create a mood board to consolidate your favorite colors, textures, and decorative elements.
Step 2: Choose Your Perfect Location & Table Foundation
The right location sets the stage for comfort and convenience. Consider traffic flow, lighting, and proximity to the kitchen for easy refills.
Your table is the canvas for your culinary masterpiece, so select one that fits your space and guest count.
Select a sturdy table. A rectangular table often works best for buffets, allowing for a clear line of progression. For smaller gatherings, a round table can feel intimate and charming.
Ensure ample space around the table. Guests need room to queue up, serve themselves, and mingle without feeling cramped. Aim for at least 3 feet of clear space around the serving side.
Step 3: Layer Your Linens & Craft a Captivating Backdrop
Tablecloths are more than just protection; they are the foundation of your aesthetic. Layering adds depth and sophistication, instantly elevating your display.
A thoughtful backdrop can transform a plain wall into a stunning focal point, tying into your theme beautifully.
Start with a base tablecloth. Choose a color or pattern that complements your theme. A crisp white or natural linen offers a clean canvas, while a bold color makes a statement.
Add a table runner or overlay. This second layer introduces texture and visual interest. Think lace for a vintage feel, burlap for rustic charm, or sequined fabric for a touch of glam.
Design a captivating backdrop. For a birthday, hang a balloon arch in varying sizes and colors behind the table. For a holiday, string fairy lights and drape evergreen garlands, or use a large fabric banner with a personalized message.
Consider a DIY photo booth backdrop. This can double as your buffet backdrop, encouraging guests to snap photos. A flower wall, fringe curtain, or a simple sheet with projected images works wonderfully.
Step 4: Create Dynamic Height & Visual Engagement
A flat buffet table can look monotonous and uninviting. Introducing varying heights is crucial for visual appeal, making your display feel abundant and professional.
This technique guides the eye, highlights signature dishes, and adds a sense of grandeur to your spread.
Utilize risers and stands. Cake stands, tiered platters, and inverted sturdy bowls (covered with fabric) are your best friends here. Use them to elevate certain dishes, creating different levels.
Group items at different heights. Place your tallest items, like a decorative centerpiece or a multi-tiered cake, towards the back or center. Graduallly step down to smaller dishes at the front.
Think beyond traditional risers. Stack vintage books, wooden crates, or even small hatboxes (covered with fabric) to add character and height. Ensure everything is stable and secure.
Elevate drinks or desserts. A beautiful drink dispenser on a stand, or a display of cupcakes on a tiered tray, immediately draws attention and makes serving easier.
Pro Tip: Use coordinating fabrics or wrapping paper to cover any makeshift risers, ensuring they blend seamlessly with your theme. This creates a polished, cohesive look.
Step 5: Thoughtfully Arrange Your Serving Dishes & Utensils
The placement of your serving dishes dictates the flow of your buffet, ensuring guests can move smoothly and serve themselves without bottlenecks. Think about the guest’s journey from start to finish.
Strategic arrangement also enhances the visual appeal, making your food look even more appetizing.
Map out the flow. Typically, plates go first, followed by main courses, then sides, and finally bread, salads, and condiments. Desserts and drinks can be on a separate table or at the end.
Group similar items together. Keep all the salad components in one area, or all the taco toppings together. This makes it intuitive for guests to build their plates.
Consider dish sizes and shapes. Use a variety of serving platters, bowls, and casseroles to add visual interest. Rectangular platters are great for mains, while round bowls work well for sides.
Place serving utensils with each dish. Ensure there are enough tongs, spoons, and spatulas for every item. Labeling dishes, especially for dietary restrictions, is a thoughtful touch.
Step 6: Style Your Food & Drink Stations with Flair
Food isn’t just sustenance; it’s an integral part of your decor. The way you present your dishes can transform them into edible art, inviting guests to indulge.
A dedicated drink station adds another layer of charm and convenience to your celebration.
Garnish generously. Fresh herbs like parsley or mint, citrus slices, edible flowers, or a sprinkle of paprika can make even simple dishes look gourmet. Think about color and texture.
Use clear containers for colorful items. Display vibrant fruit salads, layered parfaits, or sparkling beverages in glass bowls and pitchers to show off their beauty.
Create a dedicated drink station. Offer a signature cocktail, infused water, and perhaps sparkling cider. Label drinks clearly and provide ice buckets, garnishes, and appropriate glassware.
Design a dessert bar. Showcase an array of sweet treats on tiered stands, in mini jars, or on a beautiful cake stand. For a birthday, the cake is the star, so give it a prominent spot.
Pro Tip: For baby showers, consider “mocktails” in elegant pitchers. For holidays, offer a warm spiced cider or eggnog station with cinnamon sticks and whipped cream.
Step 7: Infuse Personality with Decorative Touches
This is where your unique style truly shines. Decorative elements tie your theme together, add warmth, and create an inviting atmosphere that makes guests feel special.
Think about the small details that transform a good party into an unforgettable one.
Incorporate fresh flowers or greenery. A beautiful floral arrangement is always a showstopper. For a rustic theme, use wildflowers in mason jars; for elegance, try roses in a classic vase.
Add ambient lighting. String fairy lights, place battery-operated candles, or use lanterns to create a warm, magical glow. This is especially impactful for evening events.
Personalize with signage. Hand-lettered chalkboards, framed printables, or custom banners can label dishes, display a menu, or share a sweet message related to your celebration.
Integrate themed props. For a “Under the Sea” birthday, scatter seashells and blue netting. For a holiday, use festive ornaments and pinecones. These small touches reinforce your theme.
Consider a guest book or advice station. For baby showers, ask guests to write advice for the parents-to-be. For birthdays, have them share a favorite memory of the celebrant. Place this near the buffet for easy access.
Step 8: Set Up Utensils, Plates & Napkins with Style
Practicality doesn’t mean sacrificing style. Even everyday items like plates and cutlery can contribute to your overall aesthetic if arranged thoughtfully.
Make it easy for guests to grab what they need, minimizing clutter and confusion.
Stack plates neatly at the start of the buffet. Consider using different sized plates for mains and desserts. For a more formal look, use charger plates as a base.
Arrange cutlery in creative holders. Roll silverware in napkins and tie with a ribbon, or place them in charming caddies, baskets, or even small terracotta pots for a rustic feel.
Display napkins artfully. Fold them into interesting shapes, or simply fan them out in a pretty holder. Choose napkins that complement your color scheme and theme.
Include a small waste bin nearby. Discreetly placed, it helps keep the area tidy, especially for disposable items. Label it clearly.
Step 9: Do a Final Walk-Through & Adjust with a Critical Eye
Before your guests arrive, take a moment to step back and view your buffet table from their perspective. This final check ensures everything is perfect and ready for enjoyment.
Small tweaks can make a big difference in the overall presentation and guest experience.
Check the flow and accessibility. Can guests easily move around the table? Are all dishes and utensils within reach? Adjust anything that feels awkward or crowded.
Inspect for stability. Wiggle risers and stands to ensure they are secure and won’t tip over. No one wants a wobbly cake stand!
Top off all dishes. Make sure serving bowls are full and looking fresh. Add any last-minute garnishes to brighten up the food.
Take a moment to admire your work. You’ve poured your heart into this, so enjoy the beautiful display you’ve created. It’s ready to welcome your guests!
Common Mistakes to Avoid
Overcrowding the Table
It’s tempting to put every dish out at once, but a cluttered table looks overwhelming and makes serving difficult. Instead, prioritize your main dishes and sides, keeping refills ready in the kitchen.
Embrace the “less is more” philosophy for your initial display, then replenish as needed to maintain freshness and an inviting look.
Ignoring Height Differences
A flat table lacks visual interest and can make food look less appealing. Failing to use risers or varying dish sizes results in a monotonous spread.
Always incorporate different levels to create depth and highlight key dishes, making your buffet dynamic and engaging.
Poor Flow or Accessibility
Guests fumbling for plates or getting stuck in a queue can dampen the mood. Placing items illogically or too far apart creates confusion and frustration.
Plan a clear path from plates to mains, sides, and then utensils, ensuring a smooth, intuitive serving experience for everyone.
Forgetting the “Why” Behind the Celebration
Getting lost in the logistics can sometimes overshadow the purpose of your event. A buffet that doesn’t reflect the guest of honor or the occasion feels impersonal.
Infuse personal touches, themed decor, and dishes that resonate with the celebration’s heart, making every detail a tribute to the special moment.
Troubleshooting
Limited Table Space
If your table feels too small, think vertically. Utilize multi-tiered serving trays and wall-mounted shelves or hooks if available. Consider setting up a separate, smaller table for drinks or desserts.
Use smaller serving dishes and plan for frequent refills from the kitchen, ensuring a fresh and uncluttered display.
Running Out of Food Mid-Party
This is a common worry! Prepare extra batches of popular dishes and keep them warm or cold in the kitchen. Have backup ingredients on hand for quick replenishments.
Monitor the buffet closely and discreetly refill dishes before they are completely empty, maintaining an abundant look.
Dull or Uninspiring Decor
If your table feels a bit lackluster, simple additions can make a huge impact. Add fresh flowers, even a single rose in a small vase, or string some fairy lights around the table’s edge.
Introduce a pop of color with brightly colored napkins or a vibrant table runner. Even a few well-placed themed props can instantly lift the mood.
Key Takeaways
- Plan with Purpose: Begin with your theme and guest experience in mind to guide all your choices.
- Layer and Elevate: Use linens and risers to create visual depth and make your display dynamic.
- Ensure Smooth Flow: Arrange dishes logically, starting with plates and ending with utensils, for easy serving.
- Style Your Culinary Creations: Garnish food beautifully and create dedicated, attractive stations for drinks and desserts.
- Personalize with Details: Add decorative touches like flowers, lighting, and themed props to reflect your unique celebration.
- Prioritize Practicality: Don’t forget essentials like serving utensils, waste bins, and easy access to refills.
Frequently Asked Questions
How much food should I prepare per person for a buffet?
A good rule of thumb is to estimate about 1.5 to 2 pounds of food per adult, including appetizers, mains, sides, and desserts. Adjust this based on the length of your party and if other meals are being served.
How do I accommodate dietary restrictions or allergies?
Labeling dishes clearly with ingredients or common allergens (e.g., “Gluten-Free,” “Vegan,” “Contains Nuts”) is essential. Offer a few versatile options that cater to common dietary needs, and communicate with guests beforehand.
What’s the best way to keep food warm or cold on a buffet?
For warm food, use chafing dishes with Sterno fuel, slow cookers, or electric warming trays. For cold food, set serving bowls inside larger bowls filled with ice, or use chilled serving platters. Keep lids on dishes to maintain temperature.
Can I use disposable plates and cutlery and still make it look elegant?
Absolutely! Many brands offer beautiful, sturdy disposable plates and cutlery that mimic the look of real china and silverware. Choose eco-friendly bamboo or compostable options for an elevated, conscious touch. Roll them in nice paper napkins and tie with twine or ribbon.
Our Top Recommended Finds
- White Porcelain Tiered Serving Stand: Perfect for displaying desserts, appetizers, or fruit at varying heights with elegance.
- Adjustable Height Cake Stands: Offers versatility to create dynamic levels for your centerpiece cake or other featured dishes.
- Linen Blend Table Runner Set: Provides a beautiful base layer and adds texture, instantly elevating any table setting.
Celebrate Life, One Beautiful Buffet at a Time!
You now have all the tools and inspiration to create a buffet table display that’s not just functional, but truly a work of art and a reflection of your heart.
Imagine the smiles, the laughter, and the cherished memories your beautifully styled table will help create.
Don’t wait for a grand occasion; every gathering is a chance to celebrate. Start planning your next delightful display today, and watch your vision come to life!