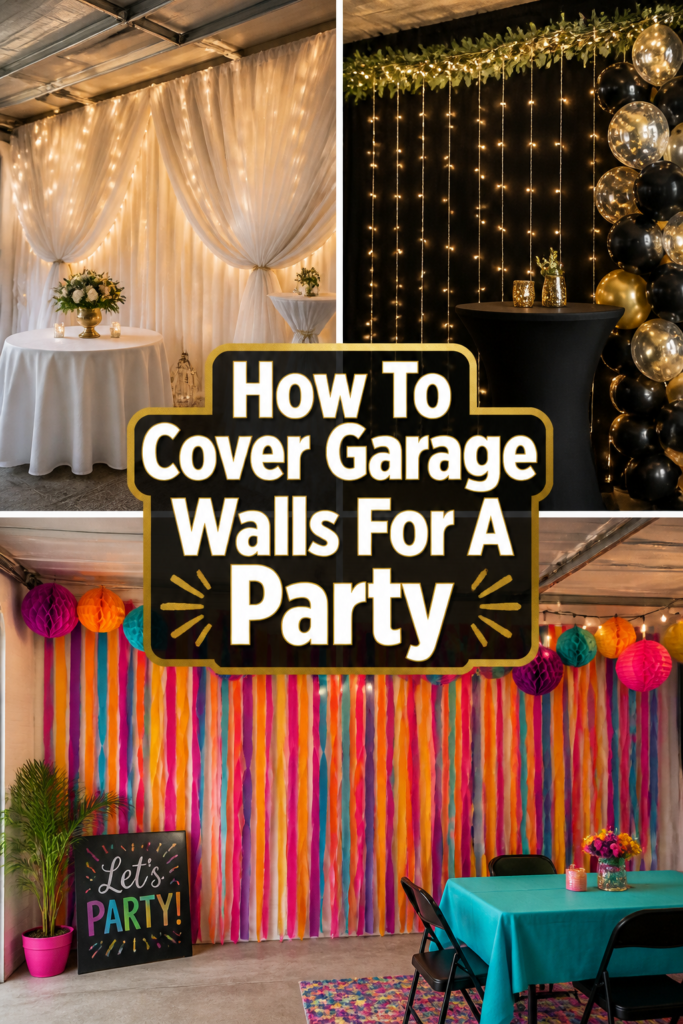
🎉 How To Cover Garage Walls For A Party
📋 The Event Planner's Essential Toolkit
Whether you're throwing a massive birthday bash or an intimate baby shower, the right tools make execution effortless. These are the 5 essential items that professional event coordinators and DIY party hosts consistently rely on to pull off flawless celebrations without the stress.
🎈 Electric Dual-Nozzle Balloon Pump
The absolute lifeline for creating those trending balloon arches and garlands that everyone loves. This dual-nozzle pump lets you inflate hundreds of balloons in a fraction of the time, saving your lungs and transforming hours of prep work into minutes.
🛡️ Command Clear Party Hooks & Strips
The secret to magazine-worthy venue decorations without losing your security deposit. Professional planners stock up on these clear, damage-free hooks to hang banners, string lights, and paper lanterns securely on walls and ceilings, removing cleanly when the party is over.
🧁 Wilton Tiered Cupcake & Dessert Stand
The easiest way to make a simple dessert table look professionally catered. This customizable, multi-tier display stand gives crucial height and dimension to your treats, effortlessly elevating the presentation of cupcakes, cookies, or appetizers at any gathering.
🚂 Heavy-Duty Collapsible Utility Wagon
The unsung hero of off-site parties, park birthdays, and trunk-or-treats. This rugged folding wagon hauls folding chairs, coolers, and mountains of decor from your car to the venue in one trip, completely eliminating the exhausting pre-party back-and-forth hauling.
📓 Clever Fox Event Planner Organizer
The ultimate command center for keeping your sanity intact while hosting. Dedicated sections for guest lists, budget tracking, vendor contacts, and day-of timelines ensure that not a single crucial detail falls through the cracks before the big day.
Transforming a utilitarian garage into a festive wonderland might seem like a huge task. But trust me, I’ve turned my own dusty space into a dazzling venue for countless birthdays and celebrations. It’s truly easier than you think.
This guide shares all my best secrets, making your party planning joyful and stress-free. Get ready to create an unforgettable backdrop for your next special event.
Quick Overview
Get ready to completely transform your garage into a magical party space. You’ll learn how to hide industrial walls and create a beautiful, cohesive atmosphere for any celebration. It’s all about clever planning and simple decor.
- Time needed: 4-8 hours (depending on ambition and garage size)
- Difficulty: Beginner to Intermediate
- What you’ll need: Cleaning supplies, covering materials (fabric, plastic, paper), hanging tools (hooks, tape, staples), decorative accents, lighting.
Step-by-Step Instructions
Step 1: Clear and Clean Your Space
Before any magic can happen, your garage needs a good decluttering. Move out cars, tools, and anything that doesn’t belong at a party. This creates a blank canvas.
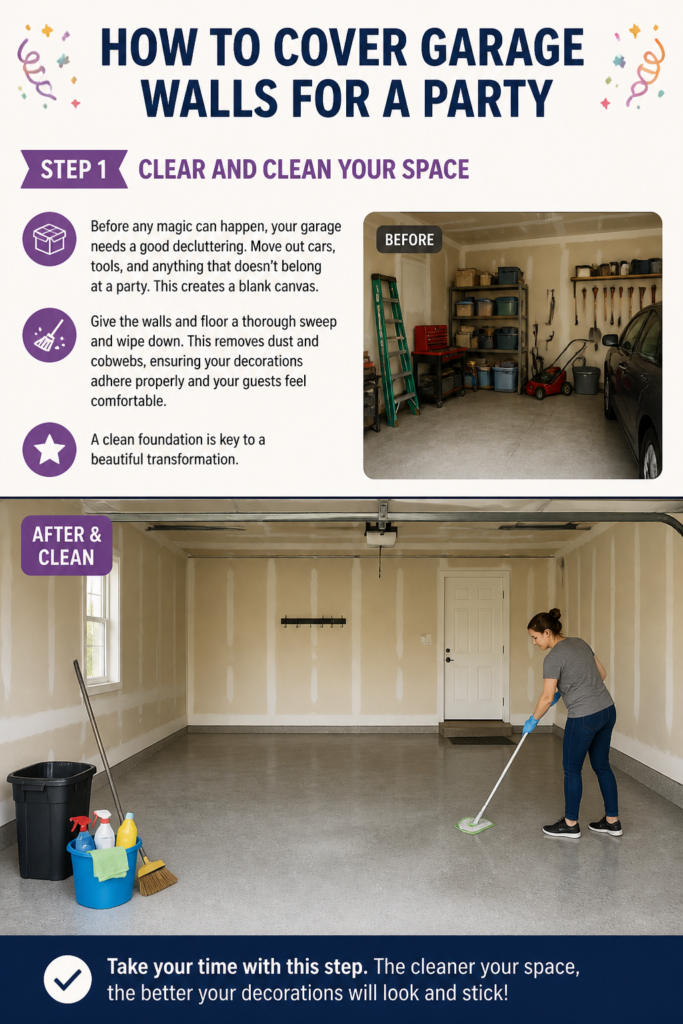
Give the walls and floor a thorough sweep and wipe down. This removes dust and cobwebs, ensuring your decorations adhere properly and your guests feel comfortable. A clean foundation is key to a beautiful transformation.
Step 2: Dream Up Your Theme and Color Palette
This is where the fun truly begins! Envision the mood you want to create for your birthday bash, baby shower, or holiday gathering. Will it be a whimsical garden party, a sophisticated cocktail lounge, or a cozy winter wonderland?
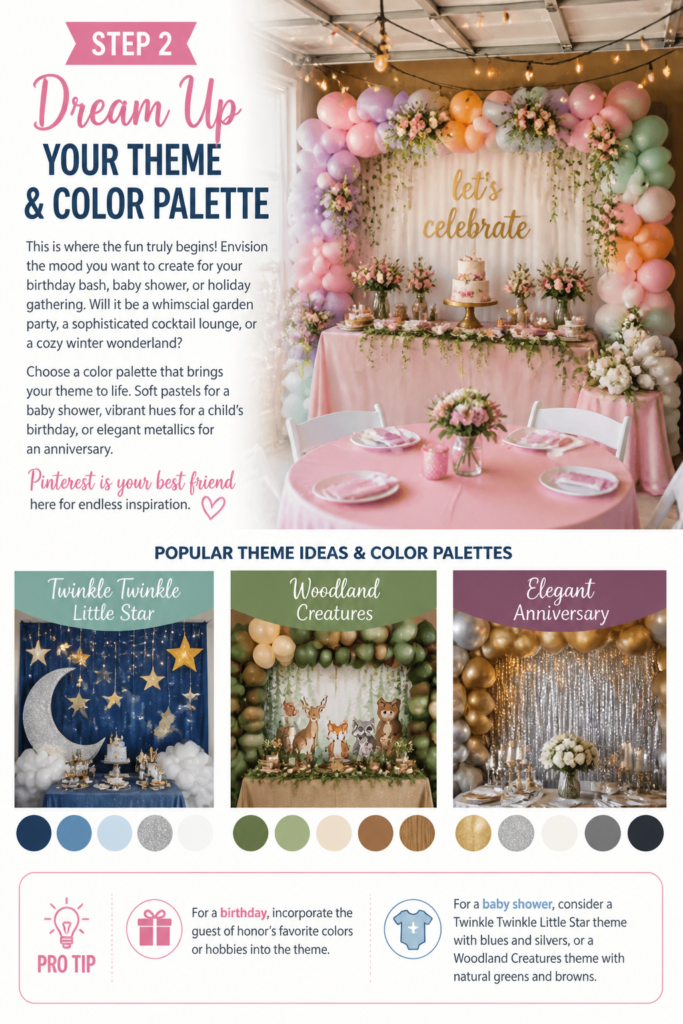
Choose a color palette that brings your theme to life. Soft pastels for a baby shower, vibrant hues for a child’s birthday, or elegant metallics for an anniversary. Pinterest is your best friend here for endless inspiration.
Pro Tip: For a birthday, incorporate the guest of honor’s favorite colors or hobbies into the theme. For a baby shower, consider a “Twinkle Twinkle Little Star” theme with blues and silvers, or a “Woodland Creatures” theme with natural greens and browns.
Step 3: Gather Your Covering Materials
Your choice of material sets the entire tone. Fabric drapes are elegant and soft, creating a luxurious feel. Think sheer curtains, inexpensive bed sheets, or even rolls of non-woven fabric from a craft store.
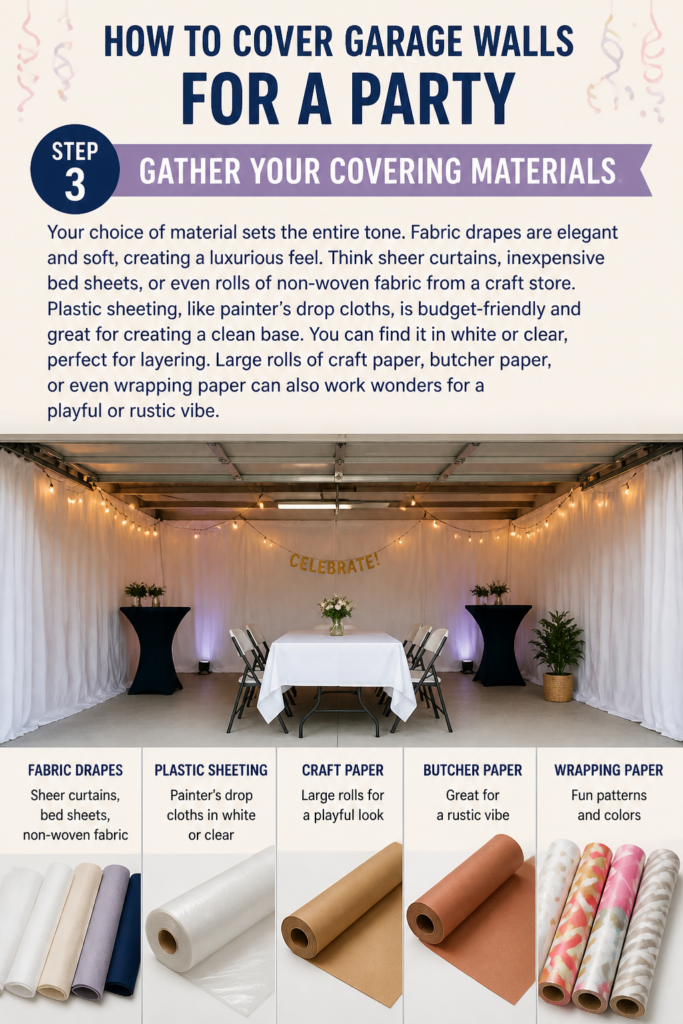
Plastic sheeting, like painter’s drop cloths, is budget-friendly and great for creating a clean base. You can find it in white or clear, perfect for layering. Large rolls of craft paper, butcher paper, or even wrapping paper can also work wonders for a playful or rustic vibe.
Step 4: Choose Your Hanging Method
The right hanging method depends on your walls and your chosen material. Command hooks are fantastic for temporary solutions, leaving no damage behind. They come in various sizes and weight capacities.
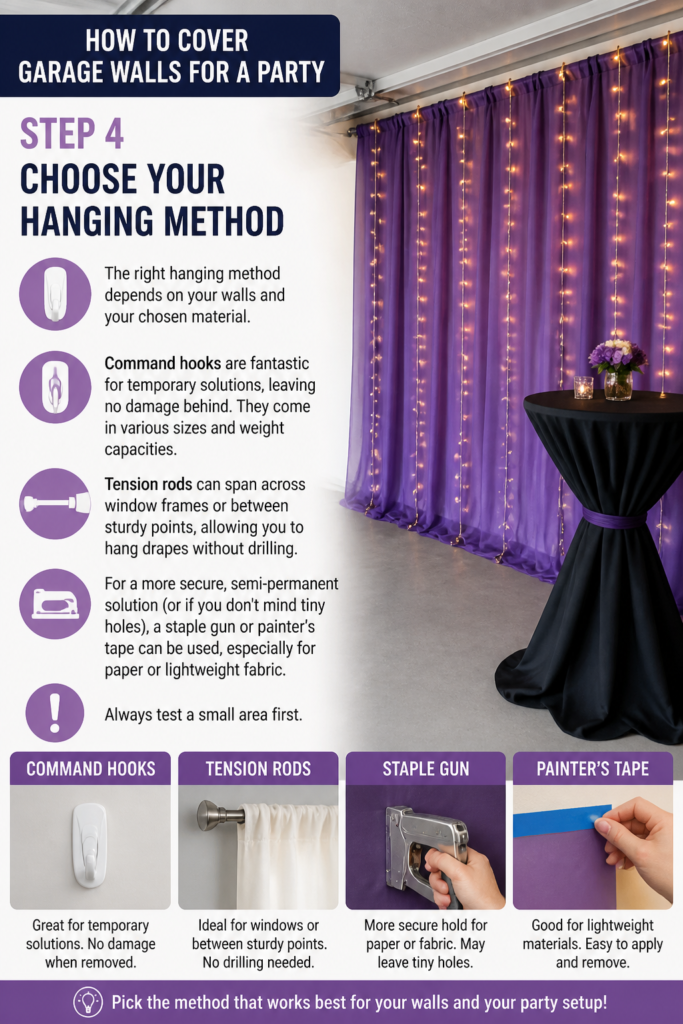
Tension rods can span across window frames or between sturdy points, allowing you to hang drapes without drilling. For a more secure, semi-permanent solution (or if you don’t mind tiny holes), a staple gun or painter’s tape can be used, especially for paper or lightweight fabric. Always test a small area first.
Step 5: Install Your Base Layer
Begin at the top of your walls, working your way down. If using fabric, aim for a full, draped look. Attach your chosen material securely, ensuring it hangs evenly and covers the garage’s existing features.
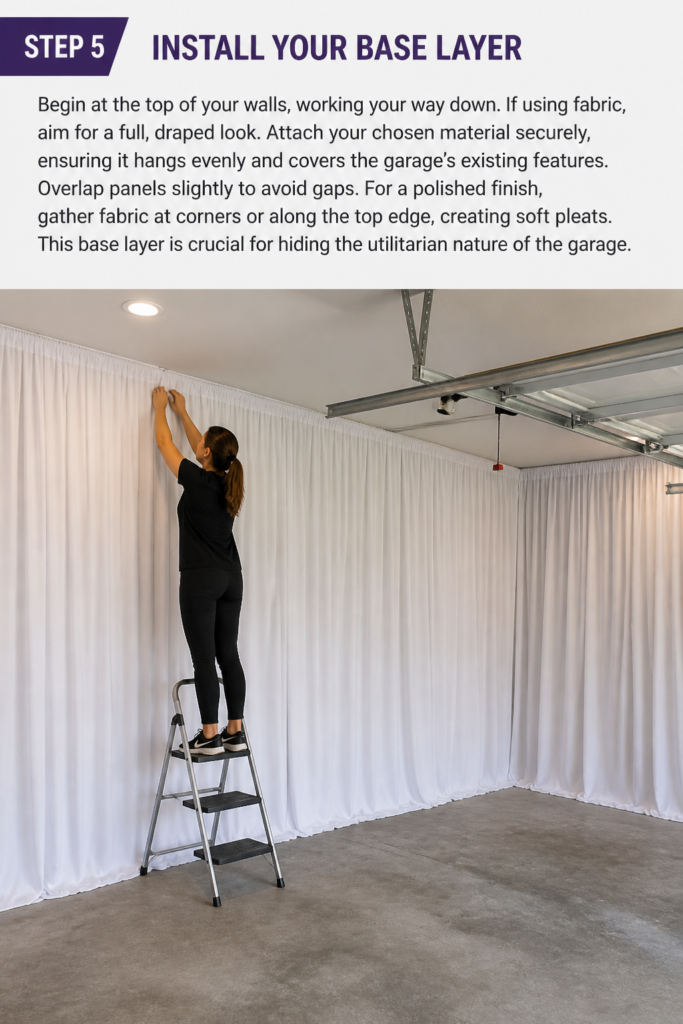
Overlap panels slightly to avoid gaps. For a polished finish, gather fabric at corners or along the top edge, creating soft pleats. This base layer is crucial for hiding the utilitarian nature of the garage.
Step 6: Add Decorative Layers and Accents
Once your base is up, it’s time to layer on the magic. Hang streamers, garlands, or banners that match your theme. For a birthday, string up a “Happy Birthday” sign. For a baby shower, display cute onesies or baby-themed cutouts.
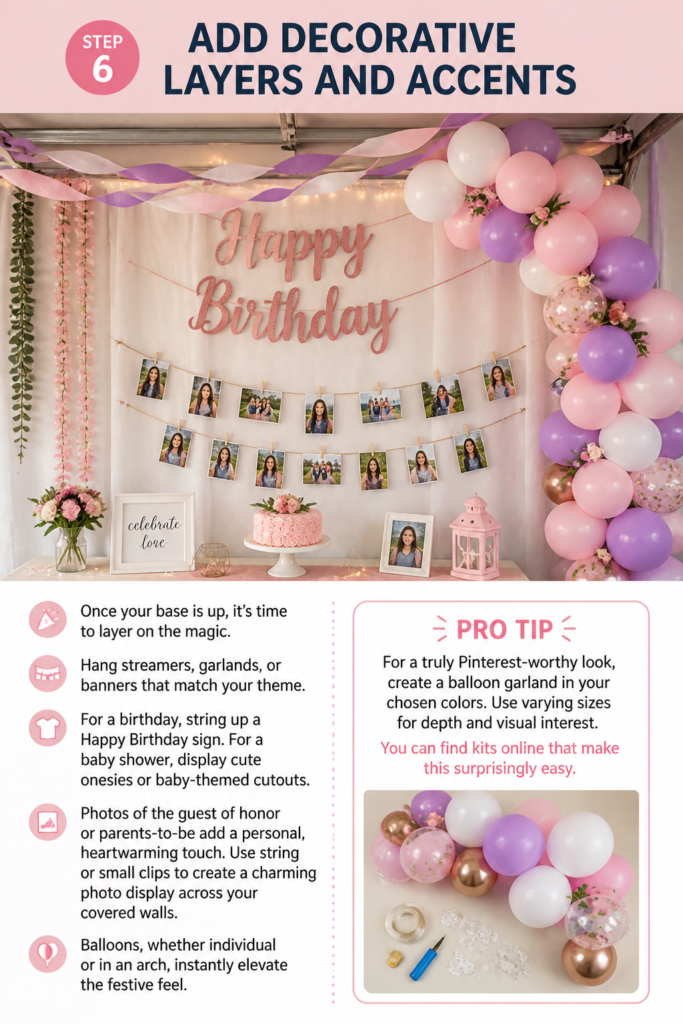
Photos of the guest of honor or parents-to-be add a personal, heartwarming touch. Use string or small clips to create a charming photo display across your covered walls. Balloons, whether individual or in an arch, instantly elevate the festive feel.
Pro Tip: For a truly Pinterest-worthy look, create a balloon garland in your chosen colors. Use varying sizes for depth and visual interest. You can find kits online that make this surprisingly easy.
Step 7: Illuminate with Enchanting Lighting
Lighting transforms the ambiance more than anything else. Fairy lights strung across the walls or draped behind sheer fabric create a warm, magical glow. Consider battery-operated options for areas without outlets.
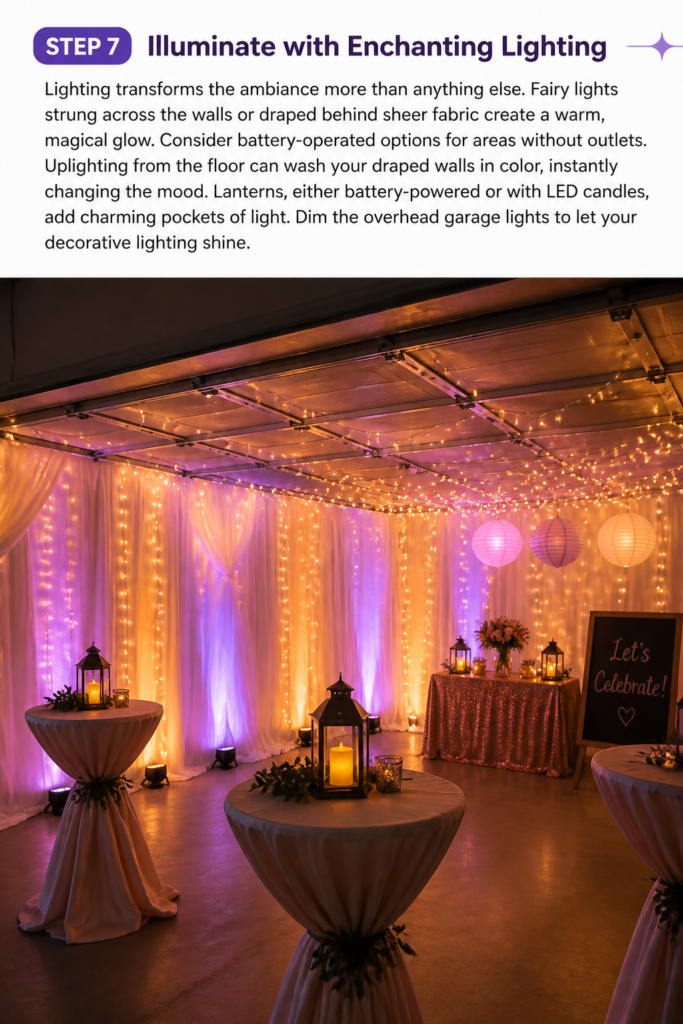
Uplighting from the floor can wash your draped walls in color, instantly changing the mood. Lanterns, either battery-powered or with LED candles, add charming pockets of light. Dim the overhead garage lights to let your decorative lighting shine.
Step 8: Style with Purposeful Props
Bring in furniture that complements your theme. A cozy seating area with throw pillows for a relaxed vibe, or elegant high-top tables for a sophisticated gathering. Even simple folding tables can be dressed up with tablecloths.
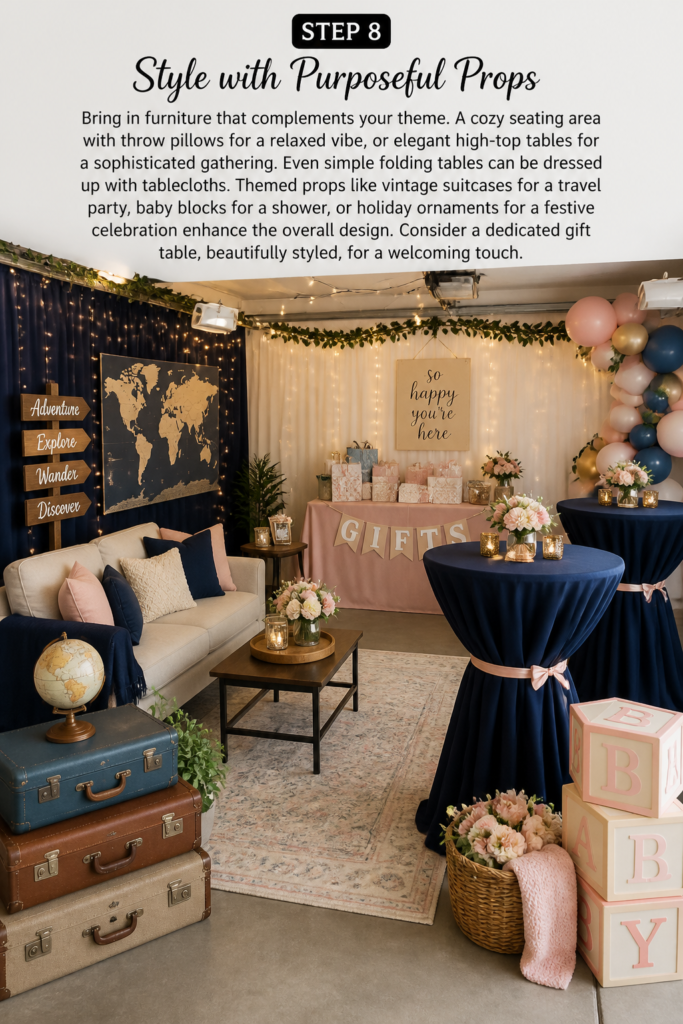
Themed props like vintage suitcases for a travel party, baby blocks for a shower, or holiday ornaments for a festive celebration enhance the overall design. Consider a dedicated gift table, beautifully styled, for a welcoming touch.
Step 9: Finalize the Details and Stand Back
Take a moment to step back and survey your creation. Are there any bare spots? Do the colors flow well? Is everything secure? This is your chance for last-minute adjustments.
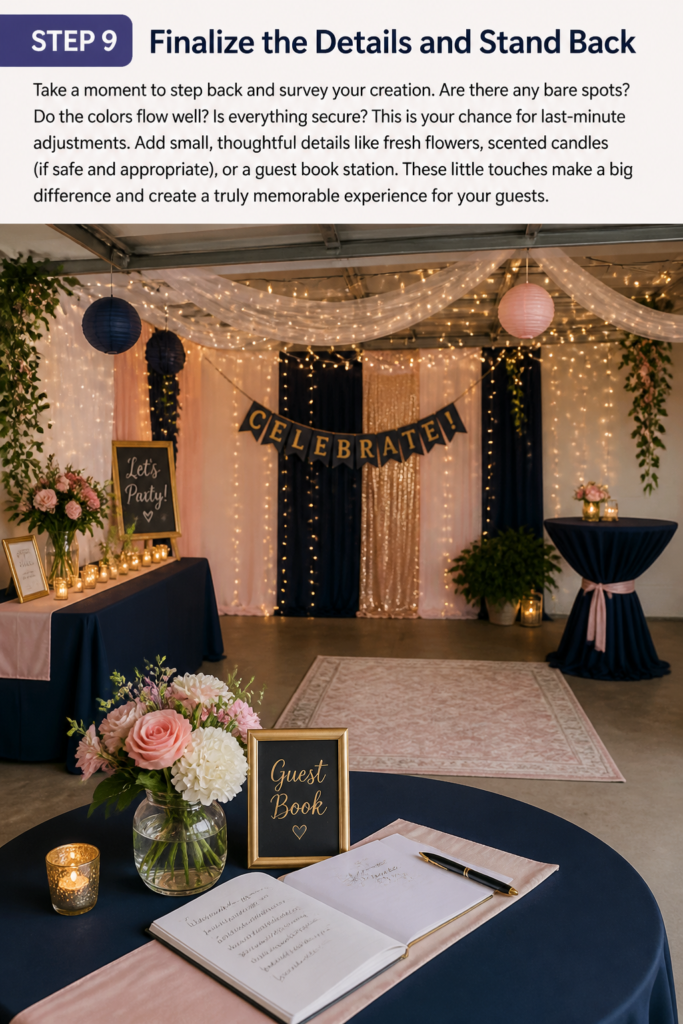
Add small, thoughtful details like fresh flowers, scented candles (if safe and appropriate), or a guest book station. These little touches make a big difference and create a truly memorable experience for your guests.
Common Mistakes to Avoid
Underestimating Cleaning and Clearing
Many people rush straight into decorating without adequately clearing and cleaning the garage. Dust and grime can make your decorations look less pristine and can even cause adhesive to fail. A dirty space also detracts from the overall party atmosphere, no matter how beautiful the coverings. Always start with a spotless foundation.
Insufficient Materials
Running out of covering material halfway through is a common frustration. It leads to patchwork walls and a less cohesive look. Always measure your walls carefully and purchase at least 10-15% more material than you think you’ll need to account for overlaps, mistakes, or unexpected gaps. It’s better to have a little extra than not enough.
Ignoring Fire Safety
When adding lights and fabrics, it’s easy to overlook safety. Draping fabric too close to hot lights or using non-UL listed electrical items can be a fire hazard. Ensure all electrical cords are in good condition, not overloaded, and kept clear of walkways. Use LED lights that run cool, and never leave candles unattended.
Forgetting the Floor and Ceiling
While the walls are the main focus, neglecting the floor and ceiling can break the illusion. A bare, concrete floor can still make the space feel like a garage. Consider rolling out an inexpensive rug, plastic floor covering, or even a dance floor. For the ceiling, balloons, string lights, or draped fabric can complete the transformation.
Troubleshooting
Drapes or Covers Are Sagging
If your beautiful drapes start to sag, it usually means the hanging method isn’t strong enough or the material is too heavy for the adhesive. Ensure your Command hooks or tape are rated for the weight of your material.
Reinforce sagging areas with additional hooks or stronger adhesive. For heavier fabrics, consider using a staple gun along the top edge of the wall (if permissible) for extra security, or use a tension rod system for better support.
Uneven Coverage or Gaps
Gaps in your wall covering can reveal the garage wall beneath, breaking the party illusion. This often happens if panels aren’t overlapped enough or if measurements were slightly off.
Carefully adjust and overlap panels to hide any visible gaps. You can also strategically place decorative elements like large balloons, banners, or posters over smaller imperfections. Use extra strips of material or paper to patch up minor areas discreetly.
Lighting Is Too Harsh or Dim
Getting the lighting just right is crucial for ambiance. If your lighting feels too harsh, you might have too many direct light sources or not enough diffusion.
Introduce more fairy lights or warm-toned LED strips, and consider placing lights behind sheer fabric to soften the glow. If it’s too dim, add more light sources or brighter bulbs, ensuring they cast a warm, inviting light rather than a stark, bright one.
Key Takeaways
- Plan Your Vision: A clear theme and color palette guide all your decor choices.
- Start with a Clean Slate: Thoroughly clear and clean the garage for the best results.
- Choose Materials Wisely: Fabric, plastic, or paper each offer a unique aesthetic and budget.
- Secure Your Hang: Select appropriate hanging methods for your walls and materials to prevent sagging.
- Layer for Depth: Combine base coverings with decorative accents, lighting, and props for a rich, inviting look.
- Prioritize Safety: Always be mindful of electrical safety and potential fire hazards, especially with lighting and fabrics.
Frequently Asked Questions
Can I use paper for covering garage walls?
Absolutely! Large rolls of craft paper, butcher paper, or even inexpensive wrapping paper can create a fantastic, budget-friendly wall covering. They are perfect for themes like a rustic picnic, a child’s art party, or a vibrant fiesta. Ensure you secure them well with painter’s tape or staples.
How do I hide wires from lights and speakers?
Clever wire management is key to a polished look. Run wires along the base of the wall, securing them with tape. You can also tuck them behind your wall coverings or use cable clips. For temporary events, consider using white or clear tape to blend wires into the wall or floor.
What if my garage walls are very uneven or damaged?
For uneven or damaged walls, fabric drapes are your best friend. Their natural folds and flow are excellent at disguising imperfections. You can also use a base layer of plain white plastic sheeting first, then layer fabric or other decorations over it for a smoother appearance. Projectors can also cleverly hide large problem areas.
How can I make the space feel less like a garage, even with covers?
Beyond wall coverings, focus on the floor and ceiling. Lay down an inexpensive rug or temporary flooring. Drape fabric or string lights across the ceiling. Introduce comfortable furniture, plants, and pleasant scents. The goal is to engage all senses to transport your guests from a garage to a magical party venue.
Our Top Recommended Finds
- Bulk Fabric Drapes: Inexpensive sheer or opaque fabric rolls transform walls elegantly and are easy to work with.
- Damage-Free Command Hooks: Essential for temporary installations, they hold strong and remove cleanly, protecting your walls.
- Warm White LED Fairy Lights: These versatile lights add instant magic and ambiance, perfect for draping or accenting.
Your Celebration Awaits!
You now have all the tools and inspiration to transform your garage into a spectacular party venue. Imagine the smiles, the laughter, and the unforgettable memories you’ll create in a space you’ve beautifully curated.
Don’t let the idea of a “garage party” limit your imagination. Embrace the challenge, get creative, and let your unique style shine through. Start planning your next celebration today, and prepare to amaze your guests with a truly special experience!