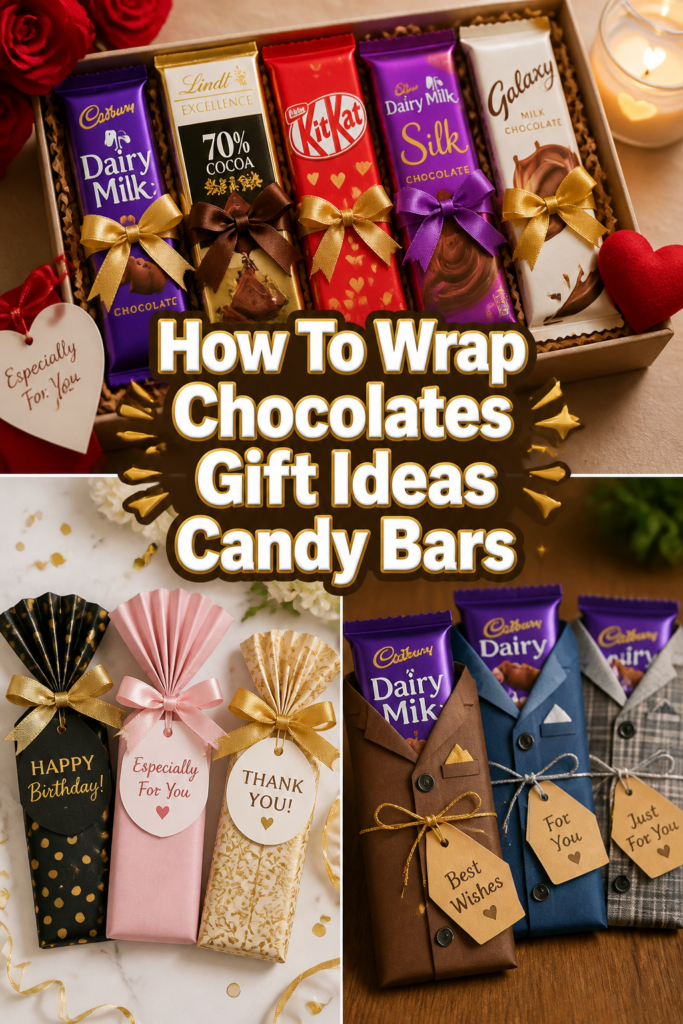
✨ How To Wrap Chocolates Gift Ideas Candy Bars
📋 The Event Planner's Essential Toolkit
Whether you're throwing a massive birthday bash or an intimate baby shower, the right tools make execution effortless. These are the 5 essential items that professional event coordinators and DIY party hosts consistently rely on to pull off flawless celebrations without the stress.
🎈 Electric Dual-Nozzle Balloon Pump
The absolute lifeline for creating those trending balloon arches and garlands that everyone loves. This dual-nozzle pump lets you inflate hundreds of balloons in a fraction of the time, saving your lungs and transforming hours of prep work into minutes.
🛡️ Command Clear Party Hooks & Strips
The secret to magazine-worthy venue decorations without losing your security deposit. Professional planners stock up on these clear, damage-free hooks to hang banners, string lights, and paper lanterns securely on walls and ceilings, removing cleanly when the party is over.
🧁 Wilton Tiered Cupcake & Dessert Stand
The easiest way to make a simple dessert table look professionally catered. This customizable, multi-tier display stand gives crucial height and dimension to your treats, effortlessly elevating the presentation of cupcakes, cookies, or appetizers at any gathering.
🚂 Heavy-Duty Collapsible Utility Wagon
The unsung hero of off-site parties, park birthdays, and trunk-or-treats. This rugged folding wagon hauls folding chairs, coolers, and mountains of decor from your car to the venue in one trip, completely eliminating the exhausting pre-party back-and-forth hauling.
📓 Clever Fox Event Planner Organizer
The ultimate command center for keeping your sanity intact while hosting. Dedicated sections for guest lists, budget tracking, vendor contacts, and day-of timelines ensure that not a single crucial detail falls through the cracks before the big day.
I still remember the joy on my niece’s face when she unwrapped a personalized candy bar at her birthday party.
It wasn’t just chocolate; it was a memory, crafted with love and a touch of sparkle.
Having transformed countless ordinary treats into extraordinary gifts, I’m thrilled to share my secrets for making every chocolate a showstopper.
Quick Overview
You’re about to discover how simple it is to turn everyday chocolates and candy bars into stunning, personalized gifts and party favors. We’ll cover everything from choosing your materials to adding those special, Pinterest-worthy touches. Get ready to unleash your inner creative genius and make every celebration truly unforgettable.
- Time needed: 30 minutes to 2 hours (depending on complexity and quantity)
- Difficulty: Beginner
- What you’ll need: Chocolates/candy bars, decorative paper, scissors, adhesive, ribbons, embellishments
Step-by-Step Instructions
Step 1: Gather Your Creative Arsenal
Before any magic can happen, you need to assemble your tools and materials. Think of this as setting the stage for your sweet masterpiece. A well-organized workspace makes the entire process smoother and more enjoyable.
Collect your chosen chocolates and candy bars. Consider their sizes and shapes, as this will influence your wrapping approach. Standard rectangular bars are often the easiest starting point for beginners.
Stock up on decorative papers. This includes scrapbook paper, craft paper, vellum, fabric scraps, or even thin wrapping paper. Look for patterns and colors that align with your event theme.
Prepare your cutting tools, such as sharp scissors, a craft knife, or a paper trimmer for precise cuts. You’ll also need a reliable adhesive like double-sided tape, glue sticks, or a hot glue gun for embellishments.
Pro Tip: Lay out all your materials on a clean, flat surface. This helps you visualize your design and ensures you don’t miss any essential items once you start wrapping.
Step 2: Choose Your Sweet Canvas
The star of the show is, of course, the chocolate! Selecting the right kind is crucial, not just for taste, but for ease of wrapping and visual appeal. Different shapes present unique opportunities for creativity.
Select standard-sized candy bars like Hershey’s, Kit Kat, or Ghirardelli squares for a uniform look. These are perfect for creating custom wrappers that fit snugly and professionally.
Consider smaller, individually wrapped chocolates for party favors, such as mini Snickers or fun-sized M&M’s bags. These are wonderful for scattering across a dessert table or tucking into gift bags.
Explore gourmet chocolate bars or artisanal truffles for a more luxurious gift. Their unique packaging often inspires elegant, minimalist wrapping that highlights their premium quality.
For a baby shower, think pastel-wrapped white chocolate bars. For birthdays, bright, colorful options are always a hit. Holiday themes can lean into dark chocolate with festive accents.
Step 3: Design Your Vision (Themes & Colors)
This is where your event truly comes to life! A cohesive theme and color palette elevate your wrapped chocolates from simple treats to integral parts of your celebration decor. Inspiration is everywhere, from Pinterest boards to nature itself.
Brainstorm themes for your event. For a birthday, it could be “Enchanted Forest” or “Superhero Academy.” A baby shower might be “Twinkle Twinkle Little Star” or “Little Sprout.”
Select a color scheme that complements your theme. For “Enchanted Forest,” think deep greens, golds, and earthy browns. “Twinkle Twinkle” calls for soft blues, silvers, and whites.
Gather inspiration from online platforms like Pinterest. Create a mood board of images that capture the aesthetic you’re aiming for. This visual guide will keep your designs consistent.
Imagine a holiday gift guide featuring chocolates wrapped in rich cranberry and forest green, adorned with tiny pinecones. Or a graduation party with chocolates in school colors, sporting miniature diploma scrolls.
Step 4: Prepare Your Wraps (Paper & Fabric)
The foundation of your beautiful wrap is the material you choose. Precision in cutting and preparing these wraps ensures a flawless finish. Take your time with this step to avoid frustration later on.
Measure your chocolate or candy bar precisely. You’ll need enough paper to cover the entire bar, overlapping by about half an inch for a secure seam. Add extra length if you plan to fold and seal the ends like a traditional candy bar wrapper.
Cut your chosen decorative paper to size using a ruler and craft knife or paper trimmer. Straight edges are key for a professional look. If using fabric, consider fray-resistant materials or hem the edges for a neat finish.
Pre-fold the paper along the edges of the candy bar before applying adhesive. This helps create crisp creases and ensures the wrap sits snugly. For fabric, a quick iron can help set folds.
Pro Tip: When making custom wrappers for candy bars, design and print your graphics onto regular printer paper first. Then, cut out the printed design and use it as your decorative wrap, ensuring a perfect fit and personalized message.
Step 5: Wrap with Precision (The Main Technique)
Now for the exciting part – bringing your design to life! Wrapping chocolates is a delicate dance of careful alignment and secure adhesion. Practice makes perfect, so don’t be afraid to try a few test wraps.
Position your chocolate bar face down on the center of your pre-cut paper. Ensure there’s an even amount of paper extending beyond each end if you’re doing a full candy bar style wrap.
Apply a thin line of double-sided tape or a glue stick along one long edge of the paper. Carefully bring the opposite long edge over to meet it, pressing firmly to create a seamless seam along the back of the chocolate.
Fold the ends of the wrapper. For a professional finish, fold the paper inwards on each side, creating triangular flaps, then fold these flaps towards the center. Secure with a small piece of tape or a dot of hot glue.
For smaller, individually wrapped chocolates, you can simply twist the ends of a square of decorative paper around the treat, securing with ribbon or twine for a charming “bon-bon” look.
Step 6: Embellish with Flair (Ribbons, Tags, Charms)
This is where you add that “Pinterest-worthy” sparkle! Embellishments transform a simple wrapped chocolate into a miniature work of art. Think about textures, colors, and how they complement your theme.
Tie ribbons or twine around your wrapped chocolates. Satin ribbons add elegance, while rustic twine suits a farmhouse or natural theme. Create simple bows or more elaborate knots.
Attach small tags with personalized messages, names, or event dates. You can hand-write these for a personal touch or print them on cardstock. Use a small hole punch and thread with twine.
Adorn with tiny charms, beads, or decorative elements. For a baby shower, consider miniature pacifiers or baby bottle charms. For holidays, tiny bells or snowflakes can be delightful.
For a birthday party, imagine bright confetti sprinkles adhered with a touch of glue. A wedding favor could feature delicate lace trim and a pearl bead, exuding sophisticated charm.
Step 7: Personalize for That Special Touch
Personalization is the secret ingredient that makes a gift truly memorable. It shows thought, care, and makes the recipient feel uniquely cherished. This step ensures your chocolates aren’t just gifts, but heartfelt gestures.
Print custom labels or messages directly onto your wrapping paper before cutting. Include the recipient’s name, a special date, or a heartfelt quote. This is perfect for birthday parties or anniversary gifts.
Hand-write a small note on a tiny scroll tucked under the ribbon. This adds an intimate, vintage feel, especially for a holiday gift or a romantic gesture.
Incorporate elements specific to the person or event. For a baby shower, use the baby’s initial. For a graduation, include a tiny replica of their school mascot or colors.
Pro Tip: Consider using a custom stamp with a monogram or a small, unique design to add a consistent, personalized touch to all your wraps, perfect for larger events.
Step 8: Display Your Masterpieces
You’ve put so much love into wrapping your chocolates; now it’s time to showcase them! How you present your creations is just as important as the wrapping itself. Think creatively about their final destination.
Arrange your wrapped chocolates in a beautiful basket or decorative box for a stunning gift. Fill gaps with tissue paper or crinkle-cut shreds in coordinating colors.
Create a captivating display on a dessert table for parties. Stack them pyramid-style, lay them in rows, or place them in clear glass jars for a visually appealing presentation.
Incorporate them into your party decor. For a baby shower, they could be “building blocks” of treats. For a holiday, hang them like ornaments on a small decorative tree.
Imagine a birthday party where each personalized candy bar serves as a place card, delighting guests as they find their seats. Or a bridal shower with elegant chocolate favors nestled in a bed of rose petals.
Common Mistakes to Avoid
Not Measuring Properly
Failing to measure your chocolate bar accurately is a common pitfall. This often results in wrappers that are too short, too long, or not wide enough to create a clean seam. An ill-fitting wrap looks unprofessional and can be frustrating to work with. Always measure twice and cut once, leaving a slight overlap for a neat finish.
Over-Decorating
While embellishments are wonderful, too many can make your wrapped chocolate look cluttered and overwhelming. The goal is to enhance, not hide, the beauty of the wrap and the treat itself. Choose one or two focal points for decoration, like a pretty ribbon and a small tag, rather than adding every charm and sticker you own. Less is often more when it comes to elegant presentation.
Using Flimsy Materials
Opting for very thin or low-quality paper can lead to rips, wrinkles, and a generally cheap appearance. The paper won’t hold its shape well, especially around corners. Invest in slightly heavier craft paper, scrapbook paper, or even good quality cardstock for your wraps. This provides a sturdy base that holds up beautifully and feels substantial in hand.
Rushing the Process
Attempting to wrap chocolates quickly can result in crooked seams, uneven folds, and adhesive mishaps. Crafting beautiful gifts takes time and patience. Allow yourself ample time for each step, especially measuring, cutting, and applying embellishments. Enjoy the creative process; the care you put in will shine through in the final product.
Troubleshooting
Uneven Wrap Edges
If your wrap edges aren’t perfectly straight, it usually points to imprecise cutting. Use a ruler and a craft knife on a cutting mat for the cleanest lines. If you’re using scissors, try to make one continuous cut rather than several small snips. For existing uneven edges, a thin ribbon or lace trim can cleverly conceal minor imperfections, adding another layer of charm.
Adhesive Not Sticking
When tape or glue isn’t holding, consider the type of paper and the environment. Some coated papers resist certain adhesives. Ensure your surfaces are clean and dry before applying. Double-sided tape designed for crafting or a low-temp hot glue gun (used sparingly) typically provides a stronger, more reliable bond. Press firmly and hold for a few seconds to allow the adhesive to set.
Decorations Falling Off
If your ribbons, tags, or charms are detaching, the adhesive might be too weak or applied incorrectly. For ribbons, a small dot of hot glue is often more secure than tape. For lighter embellishments, craft glue or strong double-sided tape can work. Ensure the surface is clean and not too textured where the item is being attached. Give glue ample time to dry completely before handling or packaging the chocolates.
Key Takeaways
- Plan Your Theme: A cohesive theme and color palette elevate your wrapped chocolates into stunning event decor.
- Measure with Precision: Accurate measurements ensure clean, professional-looking wraps that fit perfectly.
- Choose Quality Materials: Sturdy paper and reliable adhesives are essential for durable and beautiful results.
- Embellish Thoughtfully: Select a few key embellishments that enhance, rather than overwhelm, your design.
- Personalize Every Detail: Adding custom messages or unique touches makes each chocolate a truly special gift.
- Present with Care: How you display your wrapped chocolates significantly impacts their overall WOW factor.
Frequently Asked Questions
Can I use regular printer paper for wrapping?
You can, especially if you’re printing custom designs. However, regular printer paper is thinner and more prone to tearing or wrinkling. For a more durable and luxurious feel, consider using heavier cardstock or specialty craft papers available at art supply stores. If using printer paper, handle it gently during wrapping.
How do I make my wraps waterproof or food-safe?
For direct contact with food, always ensure your chosen paper is food-safe, or keep the original food-safe packaging on the chocolate. To add a layer of protection against moisture, you can spray your finished, decorated wraps with a clear, non-toxic craft sealant. Alternatively, wrap the chocolate in a layer of clear cellophane before applying your decorative paper.
What’s the best adhesive to use for a clean finish?
For seamless paper-to-paper adhesion, double-sided tape is often the cleanest and easiest option, as it leaves no visible residue. A glue stick works well for larger areas but can sometimes create bumps if too much is applied. For attaching embellishments like ribbons or charms, a low-temperature hot glue gun provides a strong, quick bond without excessive bulk.
How far in advance can I wrap chocolates?
Most chocolates and candy bars have a good shelf life, so you can typically wrap them a few weeks in advance, especially if they remain in their original sealed packaging. Store your wrapped creations in a cool, dry place away from direct sunlight to prevent melting or fading. For events, aim to finish wrapping at least a week prior to avoid last-minute stress.
Our Top Recommended Finds
- Double-Sided Tape Dispenser: Makes quick, clean, and consistent application of adhesive incredibly easy, saving you time and frustration.
- Craft Paper Cutter/Trimmer: Ensures perfectly straight and precise cuts every time, essential for professional-looking wrappers.
- Assorted Ribbon Collection: Having a variety of widths, textures, and colors on hand allows for endless embellishment possibilities, matching any theme.
Your Sweetest Creations Await!
You now have all the tools and inspiration needed to transform ordinary chocolates into extraordinary gifts and memorable party favors. Imagine the smiles, the gasps of delight, and the joy these little handmade treasures will bring. Every carefully chosen paper, every tied ribbon, tells a story of love and thoughtfulness.
Don’t wait for a special occasion to start! Pick up a candy bar or two today and experiment with your first wrap. Your creativity knows no bounds, and the satisfaction of crafting something beautiful is truly a gift in itself. Get ready to sprinkle some sweet magic into your next celebration or surprise someone special just because.