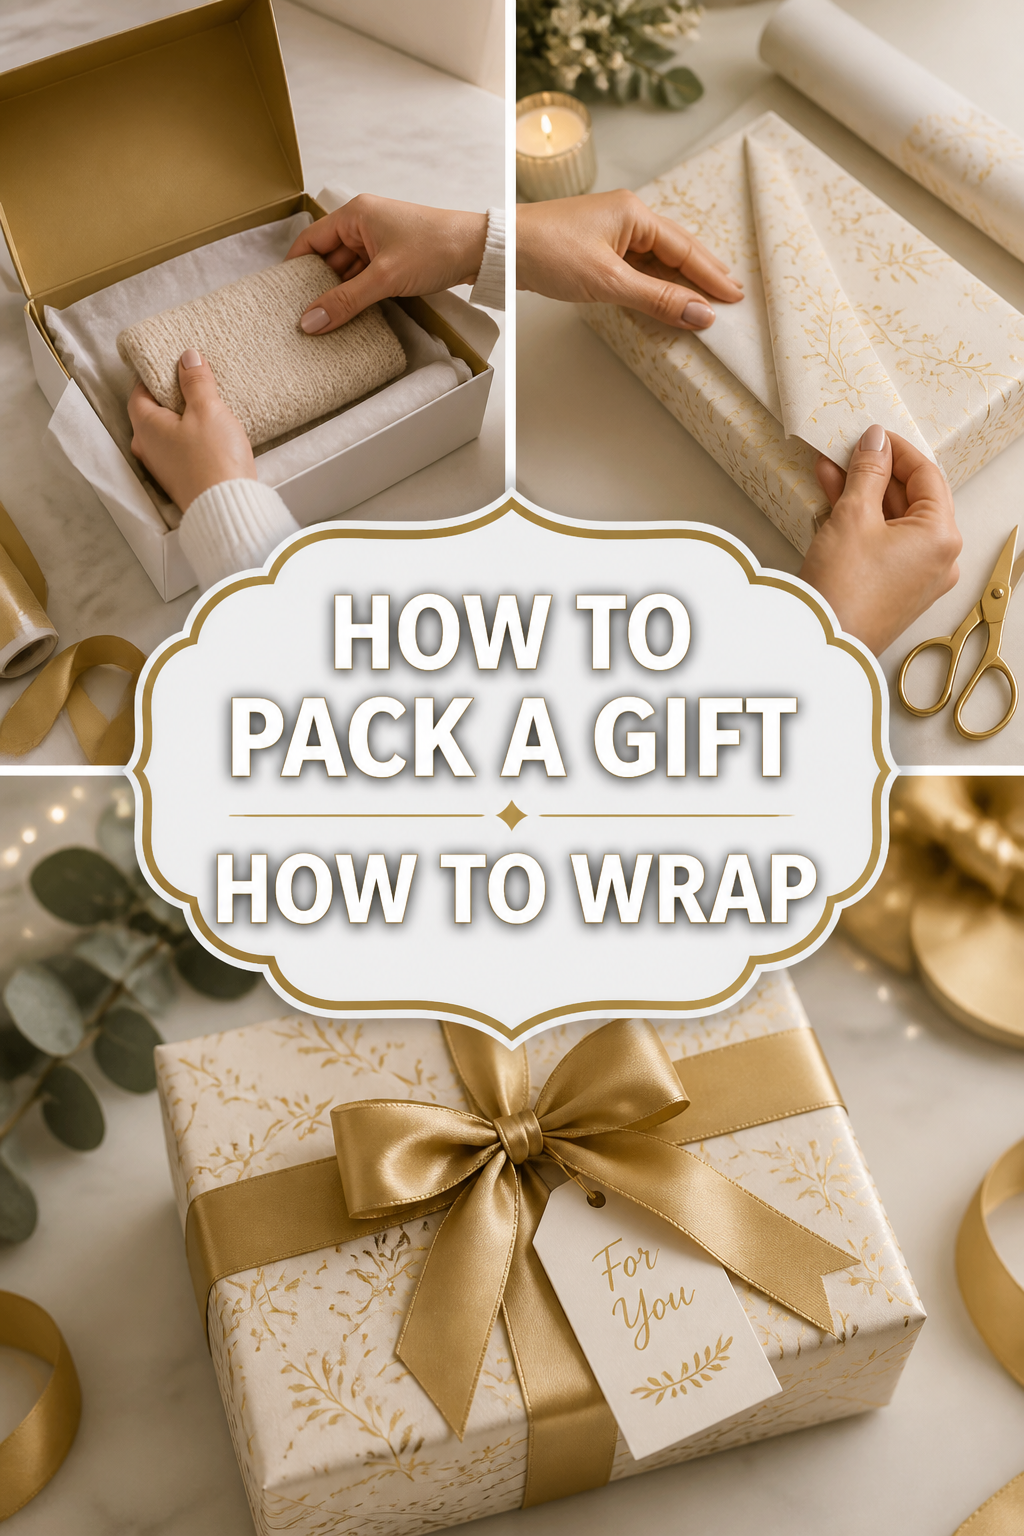
🎁 How To Pack A Gift How To Wrap
📋 The Event Planner's Essential Toolkit
Whether you're throwing a massive birthday bash or an intimate baby shower, the right tools make execution effortless. These are the 5 essential items that professional event coordinators and DIY party hosts consistently rely on to pull off flawless celebrations without the stress.
🎈 Electric Dual-Nozzle Balloon Pump
The absolute lifeline for creating those trending balloon arches and garlands that everyone loves. This dual-nozzle pump lets you inflate hundreds of balloons in a fraction of the time, saving your lungs and transforming hours of prep work into minutes.
🛡️ Command Clear Party Hooks & Strips
The secret to magazine-worthy venue decorations without losing your security deposit. Professional planners stock up on these clear, damage-free hooks to hang banners, string lights, and paper lanterns securely on walls and ceilings, removing cleanly when the party is over.
🧁 Wilton Tiered Cupcake & Dessert Stand
The easiest way to make a simple dessert table look professionally catered. This customizable, multi-tier display stand gives crucial height and dimension to your treats, effortlessly elevating the presentation of cupcakes, cookies, or appetizers at any gathering.
🚂 Heavy-Duty Collapsible Utility Wagon
The unsung hero of off-site parties, park birthdays, and trunk-or-treats. This rugged folding wagon hauls folding chairs, coolers, and mountains of decor from your car to the venue in one trip, completely eliminating the exhausting pre-party back-and-forth hauling.
📓 Clever Fox Event Planner Organizer
The ultimate command center for keeping your sanity intact while hosting. Dedicated sections for guest lists, budget tracking, vendor contacts, and day-of timelines ensure that not a single crucial detail falls through the cracks before the big day.
There is a profound magic in presenting a thoughtfully chosen gift, beautifully wrapped.
It transforms a simple item into an experience, a moment of pure anticipation and joy.
I’ve personally found immense delight in turning ordinary packages into Pinterest-worthy masterpieces, and now I’m excited to share my favorite techniques and creative secrets with you.

Quick Overview
You are about to embark on a delightful journey to master the art of gift presentation.
Get ready to create memorable moments, turning every gift into a celebration, whether for birthdays, baby showers, holidays, or just because.
- Time needed: 15-45 minutes per gift (depending on embellishments)
- Difficulty: Beginner-Intermediate
- What you’ll need: Wrapping paper, tape, scissors, ribbon, gift tags, optional embellishments like greenery, charms, or specialty papers.
Step-by-Step Instructions
Step 1: Gather Your Treasures with Intention
Begin by selecting the perfect gift for your loved one, something truly special and meaningful.
Next, gather all your wrapping supplies, considering the recipient’s personality, the occasion, and your chosen party theme.
Think beyond just paper; consider textures like kraft paper, fabric, or even a vintage scarf for an eco-chic touch.
Pro Tip: Lay out all your materials beforehand. This helps you visualize the final look and ensures a smooth, enjoyable wrapping process.
Step 2: Measure with Love and Precision
Roll out your chosen wrapping paper onto a clean, flat surface.
Place your gift in the center, face down, ensuring you have enough paper to cover all sides with about an inch or two of overlap.
For rectangular gifts, bring one long edge of the paper up and over the gift, then the other.
The paper should meet or slightly overlap on the underside of the gift for a clean seam.
Step 3: The Neat Fold and Secure Seam
Bring one long edge of the paper over the gift and secure it with a small piece of double-sided tape.
Take the other long edge, fold a crisp seam about half an inch inward, and then bring it over the first edge, securing it neatly with more double-sided tape.
This creates a smooth, invisible seam that elevates the entire presentation.
Aim for tautness without tearing the paper.
Step 4: Crafting Perfect Ends
For rectangular gifts, stand the gift on one of its short ends.
Gently push the paper inward on both sides, creating triangular pleats.
Fold the top flap down tightly against the gift, securing it with tape.
Next, fold the side flaps inward, creating a neat, crisp edge.
Finally, fold the bottom flap up, ensuring it covers the raw edges of the side flaps, and tape it securely.
Repeat this process on the other end of the gift.
Step 5: Ribbon Magic for Elegance
Choose a ribbon that beautifully complements your wrapping paper’s color and texture.
Wrap it around the gift, either lengthwise, widthwise, or both, for a classic crisscross pattern.
Secure the ribbon on the underside of the gift with a small piece of double-sided tape or a tiny dab of hot glue.
Then, bring the ends up to the top and tie a stunning bow or a simple, elegant knot with flowing tails.
For a rustic baby shower, consider twine or frayed linen ribbon. For a glamorous birthday, satin or velvet ribbons add luxury.
Step 6: Embellish with Pinterest-Worthy Flair
This is where your creativity truly shines, transforming a simple wrap into a work of art.
Attach a small sprig of fresh eucalyptus for an elegant touch, or a miniature pinecone for a cozy holiday feel.
For a birthday, consider a personalized initial charm or a tiny party hat. Baby shower gifts look adorable with a small dried flower or a wooden baby token.
You might even add a custom wax seal over the ribbon for a truly vintage and personal touch.
Pro Tip: Think seasonally or thematically. Attach a small ornament for Christmas, a delicate feather for a boho-chic birthday, or a tiny toy for a child’s gift.
Step 7: The Thoughtful Gift Tag
A handwritten message elevates any gift. Choose a beautiful gift tag that matches your theme.
Write a heartfelt, personal message that expresses your love and appreciation.
Attach the tag creatively to the ribbon, perhaps nestled within the bow or hanging gracefully from one of the tails.
Consider handmade tags for an extra special touch.
Step 8: Beyond the Box: Creative Packaging Alternatives
Sometimes, a traditional box isn’t the best fit. Explore other charming options.
Furoshiki, the traditional Japanese art of fabric wrapping, offers a sustainable and beautiful alternative, perfect for an eco-conscious friend or a unique baby shower gift.
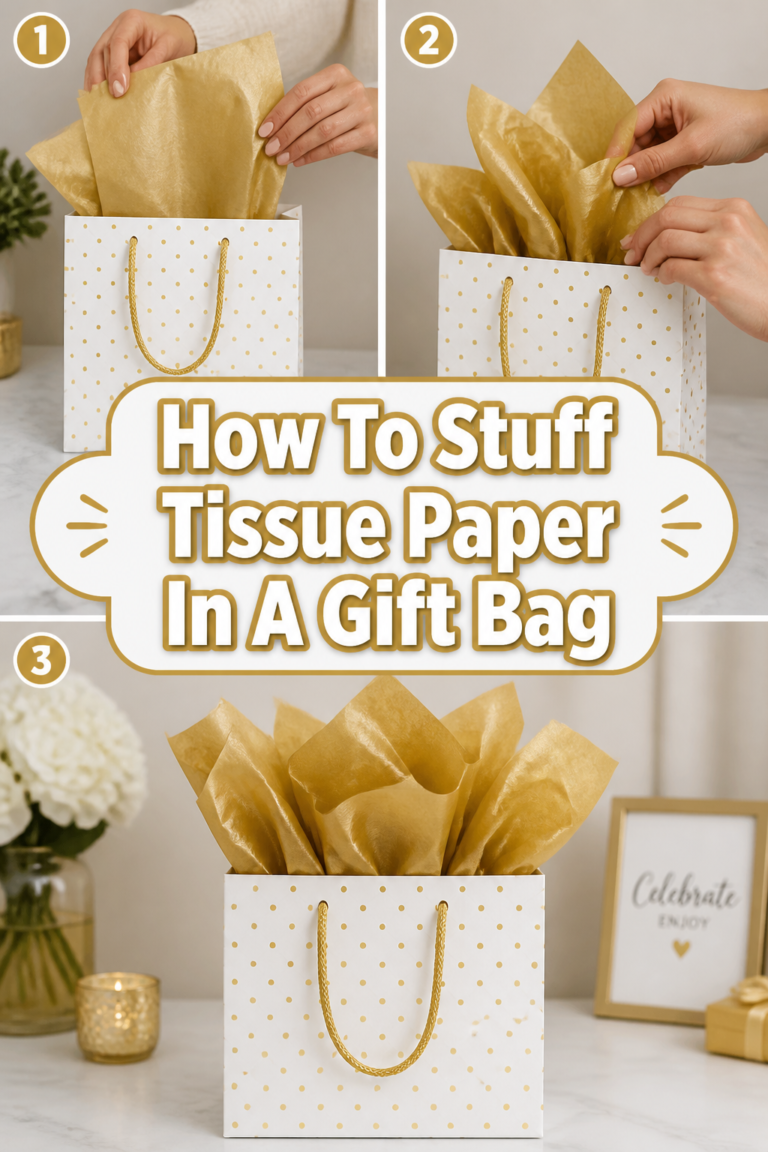
Decorative gift bags, lined with layers of coordinating tissue paper, are perfect for oddly shaped items or last-minute needs.
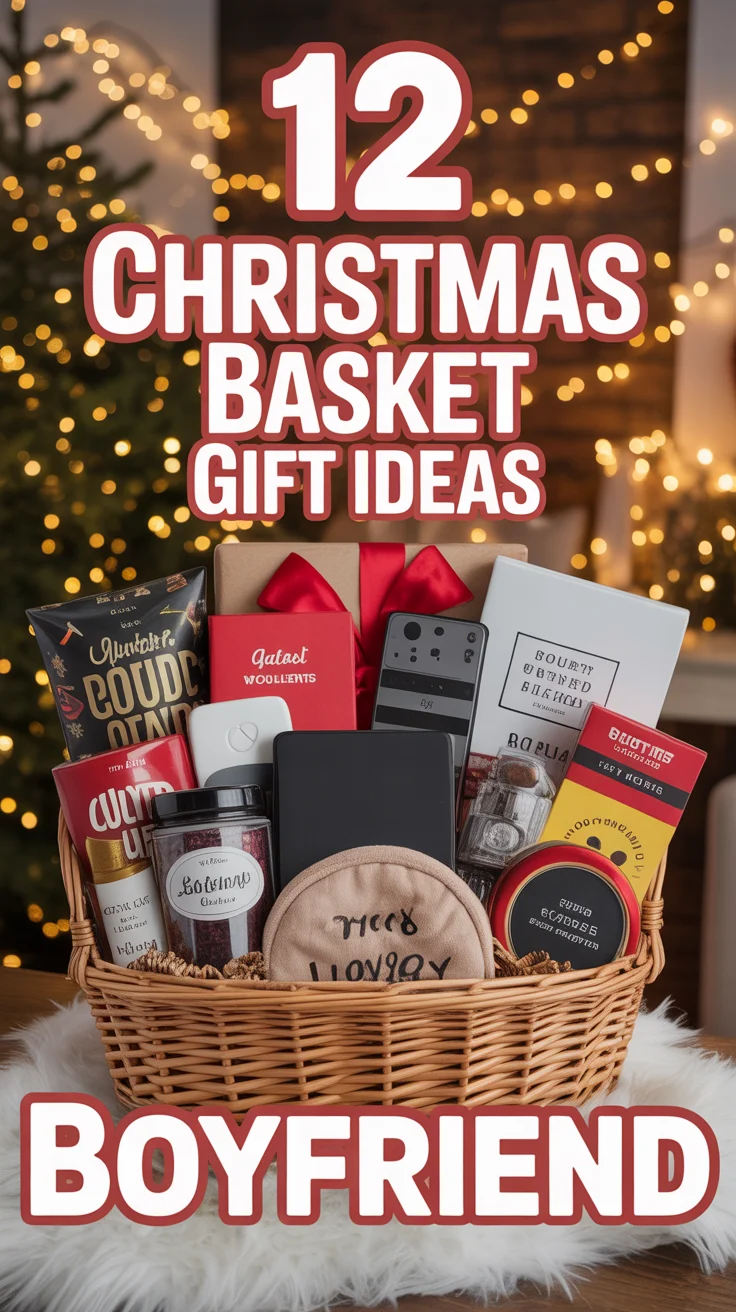
A personalized basket, filled with themed goodies and wrapped in cellophane, makes an impressive and generous presentation.
Step 9: Theme It Up! Integrating Gifts into Celebrations
Your gift wrapping can become an integral part of your party’s overall aesthetic.
Imagine a “Secret Garden” themed birthday where gifts are wrapped in floral paper, adorned with fresh blooms and delicate lace.
For a “Twinkle Twinkle Little Star” baby shower, use celestial-themed paper, silver ribbons, and tiny star charms.
Holiday gifts can reflect a “Winter Wonderland” with icy blues, silvers, and glitter, or a “Cozy Cabin” with kraft paper, plaid ribbons, and miniature bells.
Step 10: The Unveiling Experience
Consider how the recipient will open their gift.
While beautiful, ensure your wrapping isn’t so complex it becomes frustrating to open.
A small, easily accessible gift tag or a strategically placed tape tab can make the unveiling smooth and exciting.
The goal is anticipation, not exasperation.
Common Mistakes to Avoid
Too Much Paper
Using an excessive amount of wrapping paper often leads to bulky, wrinkled, and untidy packages.
It can make the gift look less professional and more like a hurried attempt.
Always measure carefully, ensuring just enough paper to cover the gift with a slight overlap, creating crisp, clean lines.
Visible Tape Marks
Sticky tape marks or overlapping pieces of tape can distract from the beauty of your chosen paper and embellishments.
It makes the package look less polished and refined.
Opt for double-sided tape whenever possible for invisible seams, or strategically place clear tape on the underside of folds or beneath ribbons to keep it hidden.
Lack of Personalization
A generic, uninspired wrap can make a gift feel less personal, even if the gift itself is perfect.
It misses an opportunity to connect with the recipient before they even open the package.
Always add a personal touch, whether it’s a handwritten tag, a special embellishment, or a ribbon color chosen specifically for them.
Wrinkled or Torn Paper
Presenting a gift wrapped in creased, wrinkled, or even slightly torn paper instantly diminishes its perceived value and thoughtfulness.
It suggests a lack of care and attention to detail.
Handle your wrapping paper gently, store rolls properly, and if using fabric, iron it for a pristine finish.
Troubleshooting
Oddly Shaped Gifts
Wrapping an irregularly shaped item can feel like a daunting challenge, often leading to lumpy, uneven results.
The solution is to embrace alternative packaging. Place the item in a decorative gift bag, nestle it in a beautiful box filled with tissue paper, or wrap it in a piece of fabric using the furoshiki method.
Running Out of Paper Mid-Wrap
Discovering you don’t have enough paper halfway through wrapping can be frustrating and lead to a rush job.
If you find yourself short, don’t panic. You can create a stylish “belly band” by using a strip of contrasting paper or fabric to cover the gap, turning a mistake into a design feature.
Ribbon Won’t Lie Flat or Looks Sloppy
A beautiful ribbon can quickly lose its charm if it constantly slips, bunches, or your bow looks less than perfect.
To fix this, choose a ribbon with a bit more structure, or use tiny dots of hot glue or double-sided tape on the underside of the ribbon to secure it in place.
Practice different bow-tying techniques, like a classic florist’s bow, for a more polished look.
Key Takeaways
- Preparation is paramount; gather all your supplies before you begin for a seamless experience.
- Measure your paper carefully to avoid excess bulk and ensure a neat, professional finish.
- Embellishments are your secret weapon; they transform a simple gift into a memorable statement.
- Personalization, even a small detail, makes the recipient feel truly cherished and seen.
- Always consider the occasion and the recipient’s style to guide your design choices.
- Embrace creativity and have fun with the process; your joy will be evident in the final presentation.
Frequently Asked Questions
How do I wrap an irregularly shaped gift without a box?
For items that defy traditional wrapping, consider placing them in a decorative gift bag with plenty of tissue paper, or wrapping them in fabric using the elegant furoshiki technique. You can also create a custom basket filled with crinkle paper and cellophane for a beautiful presentation.
What’s the best type of tape for gift wrapping?
Double-sided tape is your best friend for an invisible, professional finish, especially for securing paper seams. Clear cello tape is also useful for durability, but try to hide it under folds or ribbons for a cleaner look.
Can I reuse wrapping paper or other gift packaging?
Absolutely! Encourage recipients to carefully open gifts so paper can be smoothed and reused. Fabric wraps (furoshiki) are inherently reusable, and decorative gift bags and boxes can be stored and repurposed for future occasions, making them an eco-friendly choice.
How do I make a perfect, fluffy bow?
Creating a beautiful bow takes a little practice. Start with a generous length of ribbon, making several loops on each side, then securing them tightly in the center with a thin piece of wire or another ribbon. Fluff out each loop to create volume. Many online tutorials offer visual guides for various bow styles.
Our Top Recommended Finds
- High-Quality Double-Sided Tape: Essential for a seamless, professional finish without visible tape lines.
- Sharp Craft Scissors: A good pair of sharp scissors ensures clean, crisp cuts, preventing jagged edges and frustration.
- Assorted Ribbon Collection: A variety of ribbons in different widths, textures, and colors provides endless possibilities for customization and flair.
Your Gift, Reimagined: The Art of Thoughtful Presentation
You now hold the secrets to turning every gift into a cherished memory, a moment of delight even before the ribbon is untied.
Imagine the smiles, the gasps of joy, as your beautifully crafted packages are presented at the next celebration.
Whether you’re planning a whimsical birthday party, a serene baby shower, or a festive holiday gathering, your newfound wrapping skills will elevate the entire experience.
Envision a “Boho Chic” birthday with gifts wrapped in earthy tones, adorned with dried flowers, or a “Winter Wonderland” baby shower where packages sparkle with silver and soft blues.
Don’t just give a gift; give an experience, a piece of your heart beautifully presented.
Start planning your next unforgettable celebration and let your creativity shine through every perfectly packed and wrapped treasure today!